
The System 441 Accounts Receivable Module uses a subliminal form of Point-of-Sales -- and therefore several Item-related setups must also be done to facilitate A/R Processing.
The following are intended as illustrative examples of how to do the setups. Your Installation's setups may differ.
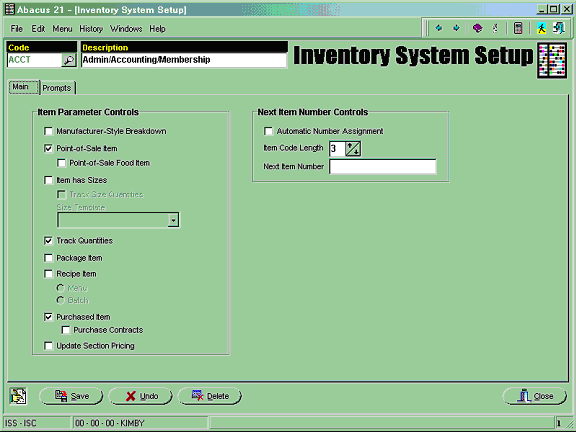
Create an Item System for Admin/Accounting/Membership.
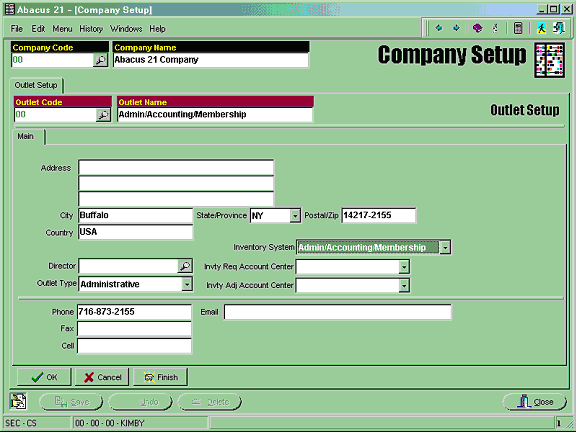
Remember to go back into Company Maintenance and attach this to your Admin/Accounting/Membership Outlet.
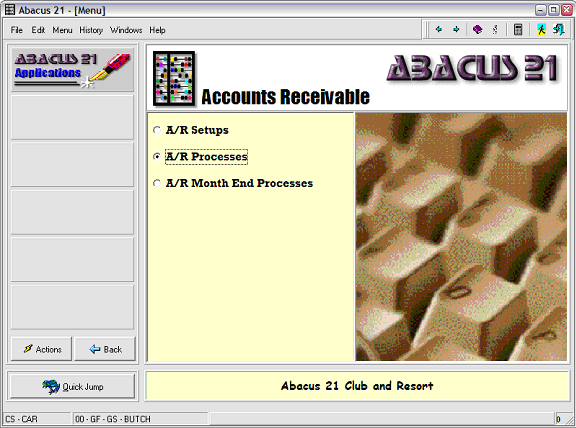
Quick Jump to CS/CAR, select A/R Setups:
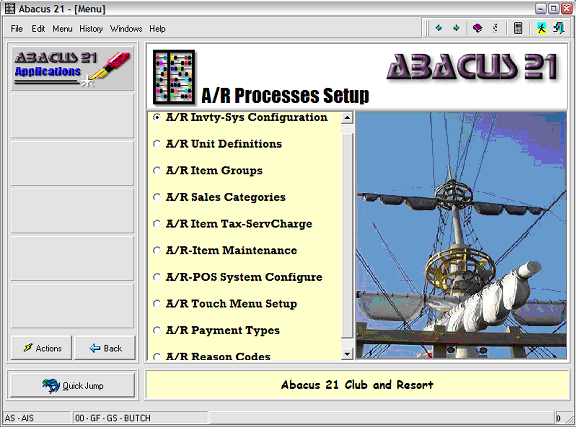
Next select Inventory System Configuration:
Remember to go back into Company Maintenance and attach this 'Inventory System' to your Admin/Accounting/Membership Outlet:
Next, Quick Jump to GL4-GLD. Go into Distribution Code Setup. You will need to build a Distribution Code for each type of Periodic Billing and Late Charge, one for each of the various G/L Accounts that a particular Dues, Minimum or Late Fee should be posting to. For example, if all of your various Dues only post to one G/L Account, then all you will need to create is one Distribution Code called DUES:
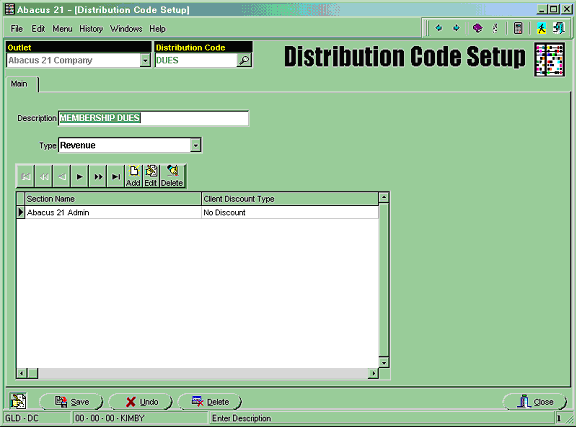
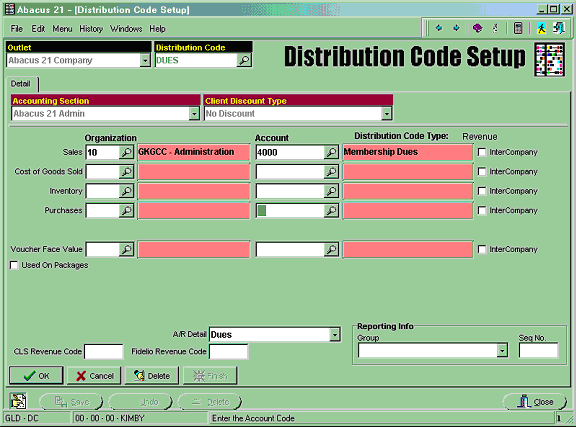
Set it up as a Revenue Type. You will only need to fill in the Sales Line and the A/R Detail Bucket as shown below:
These types of Distribution Codes will be attached to actual Items that you will be building to represent the types of Billing Charges for your Accounts Receivable.
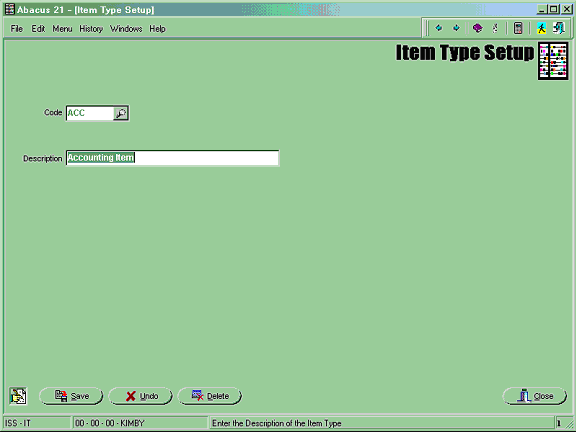
Next, create an Item Type:
Set up ACC for the Accounting kinds of Transactions.
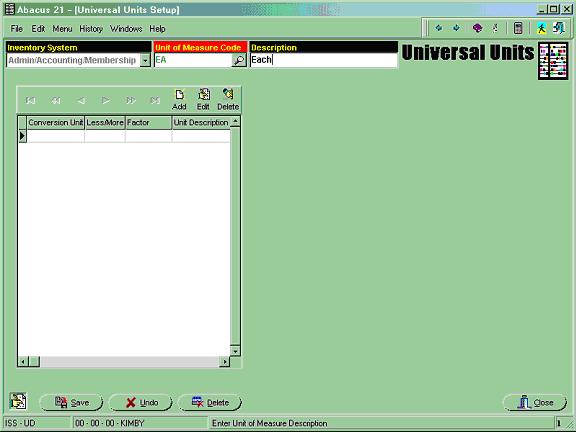
Units – Setup one Unit called EA for Each:
Item Groups – Set up ACC for Accounting Group. Only one is needed as ‘Accounting’-related items are not physically counted:
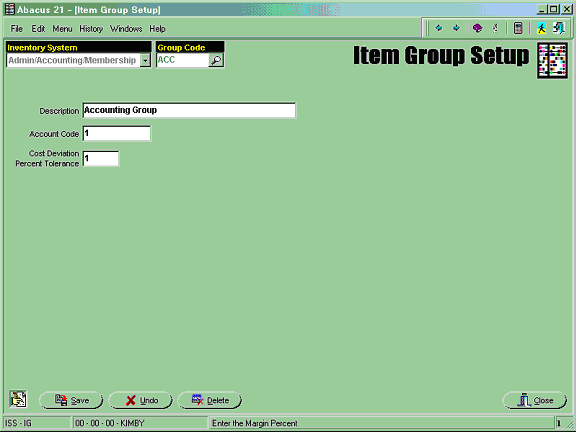
Note that the 'Account Code' and 'Cost Deviation Percent Tolerance' are not needed... but nonetheless require a (meaningless) entry.
Sales Categories - You may get as broad or as specific as you choose. The more specific your Sales Categories are, the more detail you will be able to obtain from Sales/Billing Analysis reports. For example, ACC for Accounting, or (if you choose to get more specific) you may setup DUE for Dues, MIN for Minimums, LOC for Locker, etc. Or, even more specific... breaking down your particular types of Dues: RESDUE – Resident Dues, CORPDUE – Corporate Dues, etc.
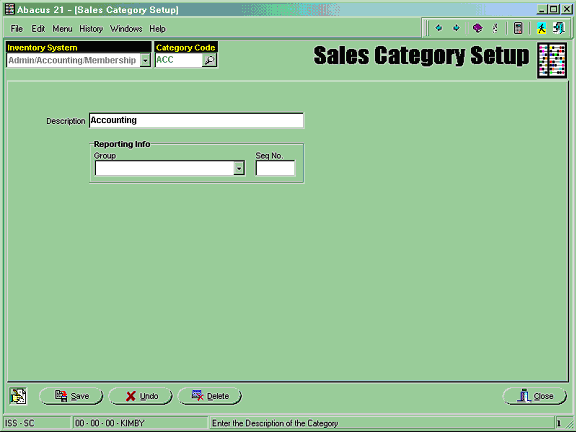
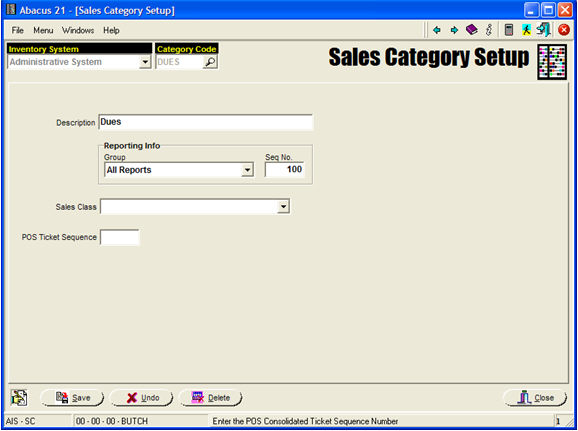
The example below shows a Sales Category that to accommodate Dues (of various Types):
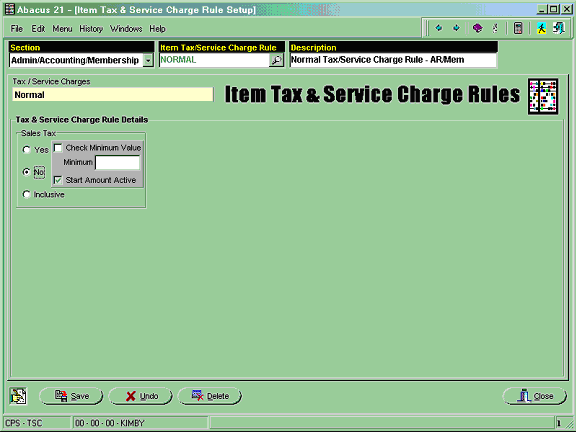
Item Tax/ServiceCharge – Set up as many rules as are appropriate for the Accounting-related Items. For example, if you do not Tax or Service Charge any of the Accounting/Membership related charges, you can set up a Normal Tax Rule and check 'No' for the Tax and or Service Charge as seen below:
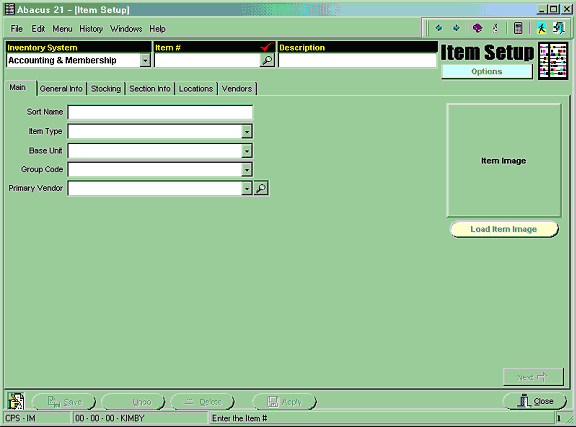
Item Maintenance - You must set up an Item for each of your particular Periodic Charges... as well as your Late Fees:
... and Searching for Items (to show examples):
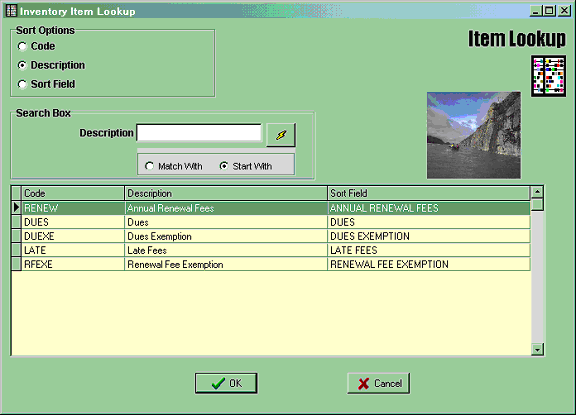
Above is an example of the types of Items that you will need to build.
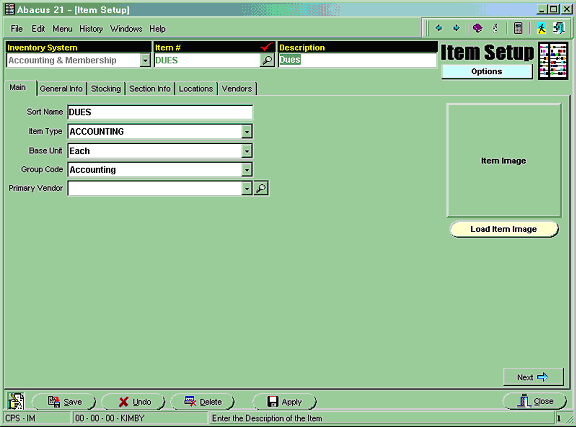
You may need to build a separate Item for each of your Dues if you they post to different General Ledger Accounts... because then they will require a different Distribution Code.
Shown below is a sequence of screen illustrating the typical setups for Dues:
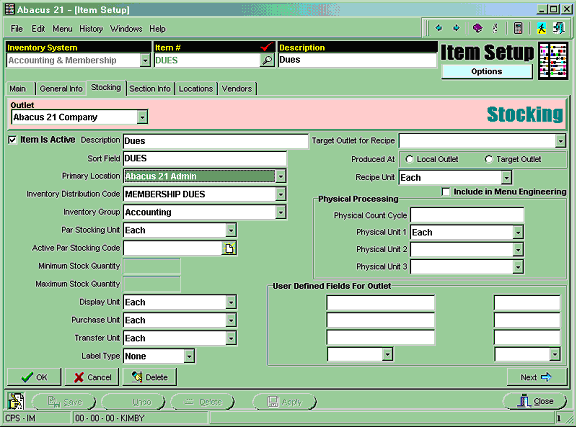
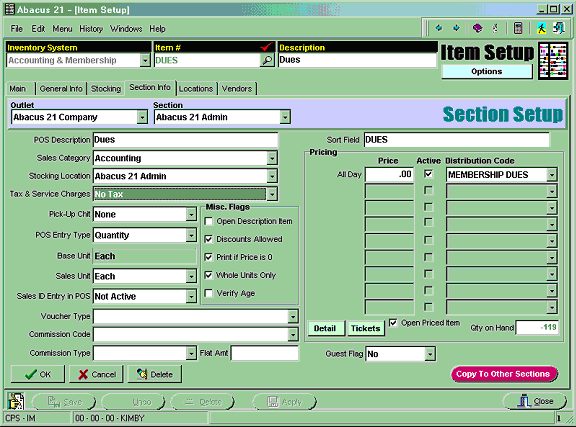
When building the Section Info Screen (above), be sure to check the Open-Priced checkbox... and leave the actual (All-Day) Price blank. (The actual billing amounts will be entered on a different screen.)
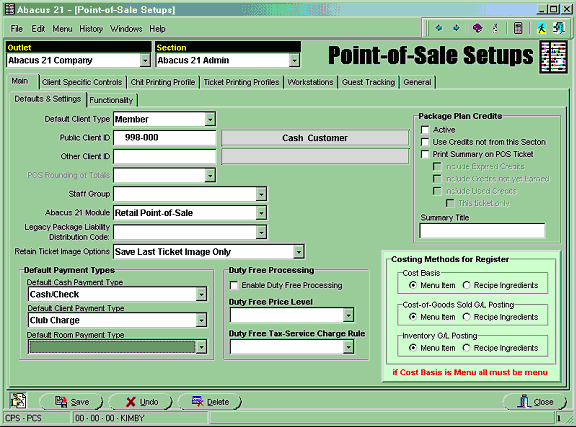
POS Configuration – This must be set up for the Admin/Accounting Outlet/Section as well... so that you will be able to view/edit the Periodic Charges after they process (in a BackOffice version of POS). Set it up as Retail Style... with all of the other ‘normal’ settings that you are using in Point-of-Sale:
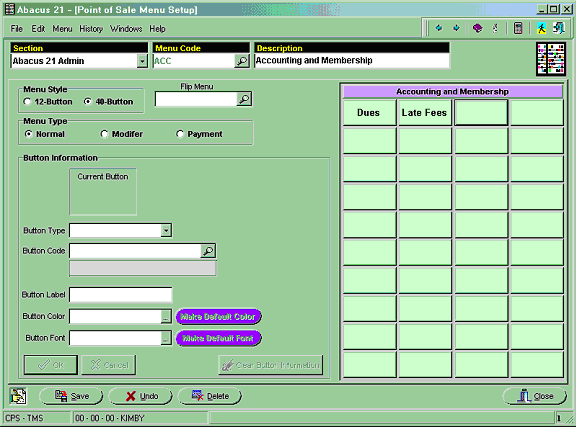
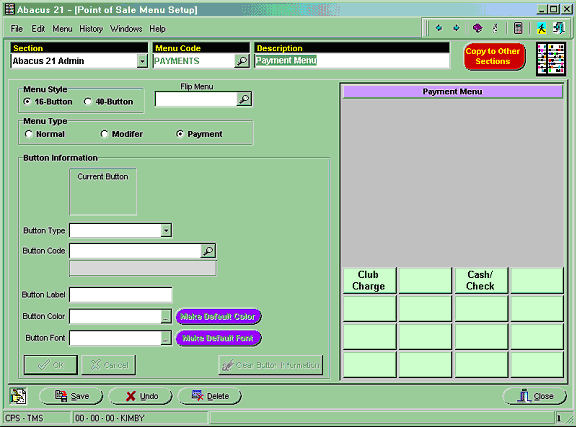
Touch Button Setup - You will want to set up at least one Touch-Menu... and the required Payment Menu (Payment Types must be built first – see next step). This will allow you to view/edit the Periodic Charges once they are processed.
For the Charges:
For the Payments:
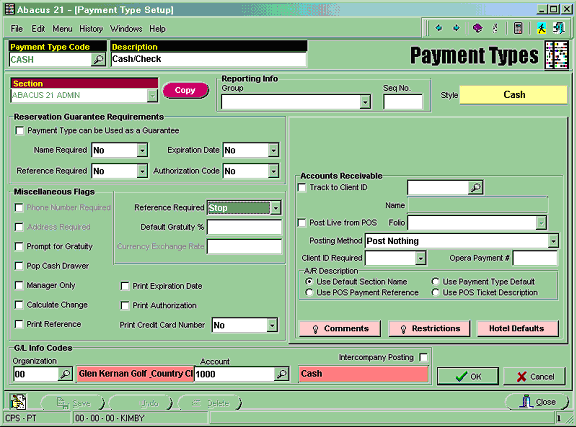
Payment Type Maintenance – Set up all appropriate forms of Payment that you accept for Cash Receipts against A/R Charges. You may also want to set up Credit Card Payment Types if you also accept those forms of payment.
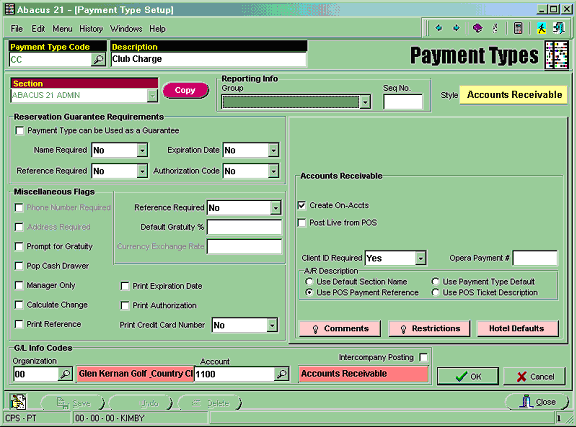
You will need a Member Change Payment Type set up in this Section because it will be used as the default for Periodic Billings.
The example below is for Cash/Check:
This is the example of the Member Charge Payment Type:
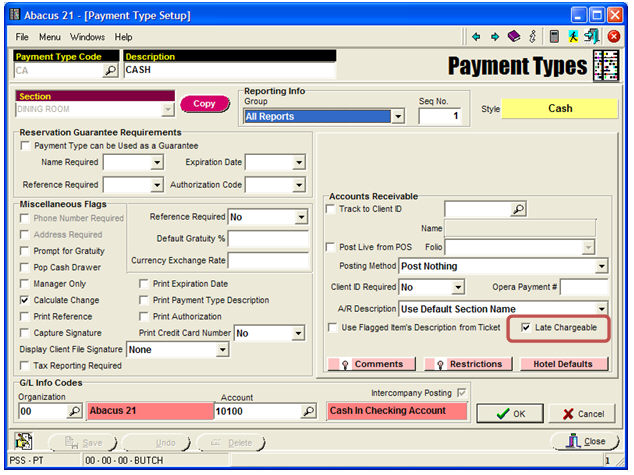
In the Payment Type sample below, note the 'Late Chargeable' flag. This flag defaults to 'Yes' (checked)... indicating that this particular Payment Type should be considered in the subject-to-Late-Charge calculation process... but could (by exception) be changed to 'No' (un-checked) if this Payment Type should not be considered.
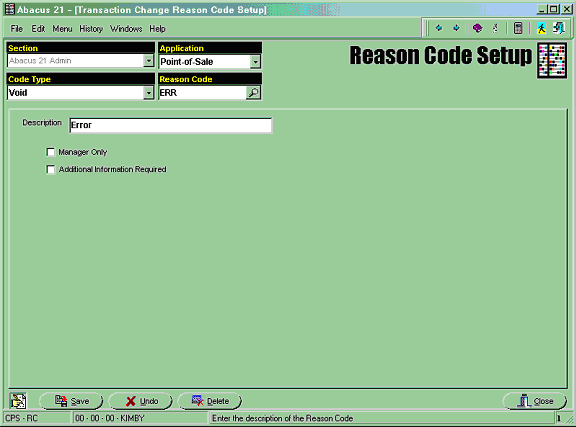
Reason Codes - You may wish to set up at least one Void Reason Code in case you need to edit (void) a particular Periodic Billing (or other Charge) off of a Member. Usually, no Mark Down Reason Codes are used... as Dues and such are almost never ‘Marked Down’.
The preliminary setups are now complete... and Member Type Charge Setups can be done.
![]()