
A condensed version of the setups necessary in order to utilize the Abacus-TOPS WorkOrder Interface is presented here.
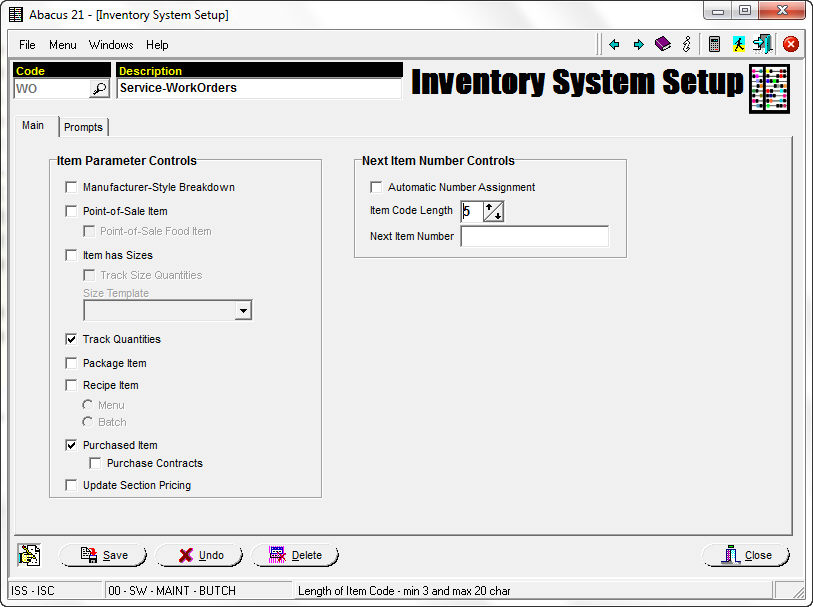
Define the Inventory-System appropriate for WorkOrders:
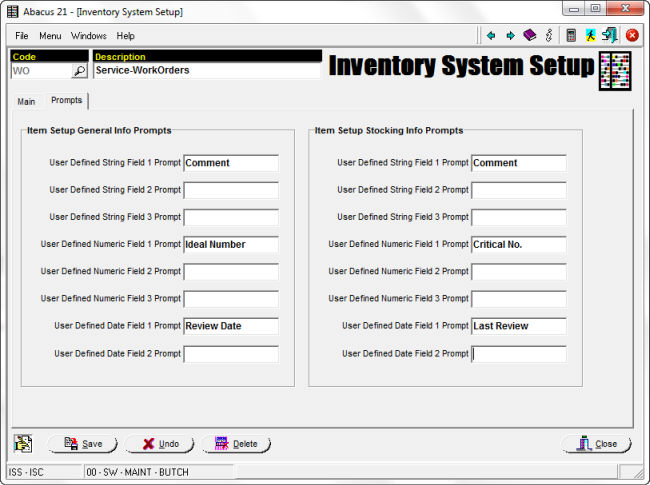
Optionally, the User-Defined Field Prompts can be defined:

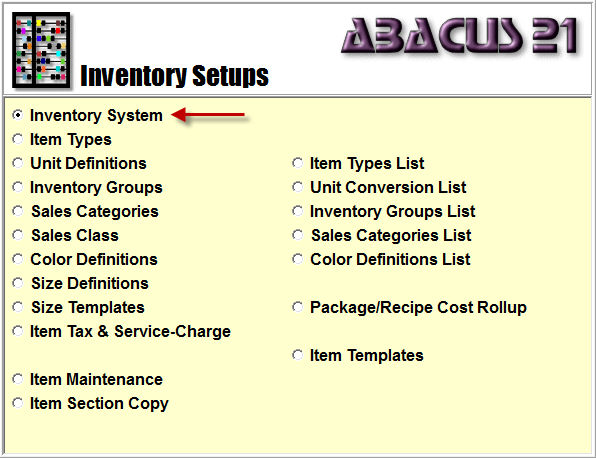
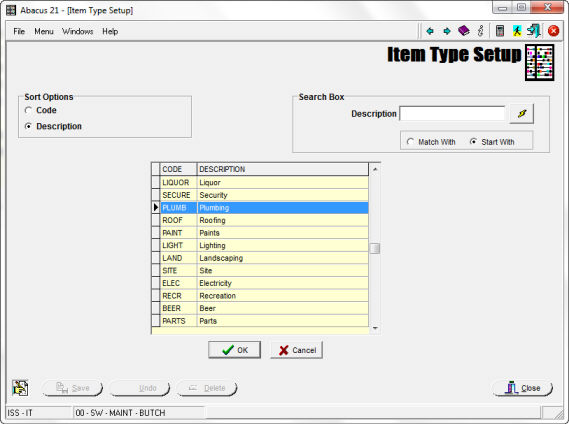
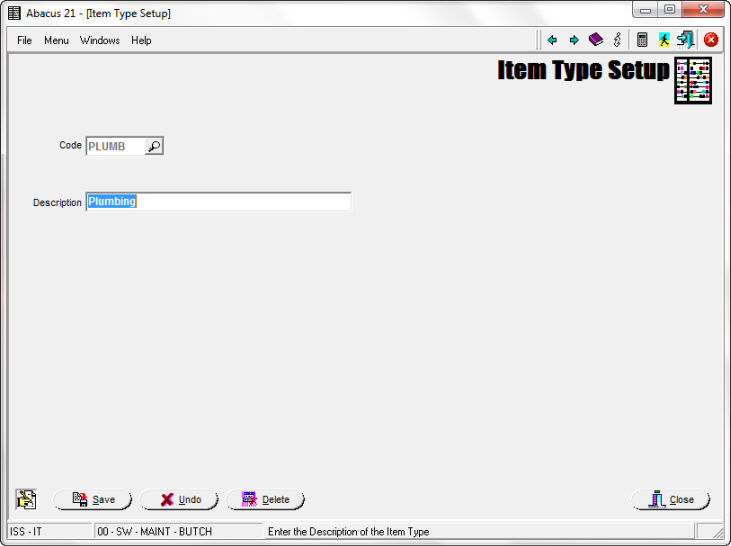
Item Types are broad classifications of Inventory Items -- used for Physical Count Selection and Inventory-Valuation purposes:

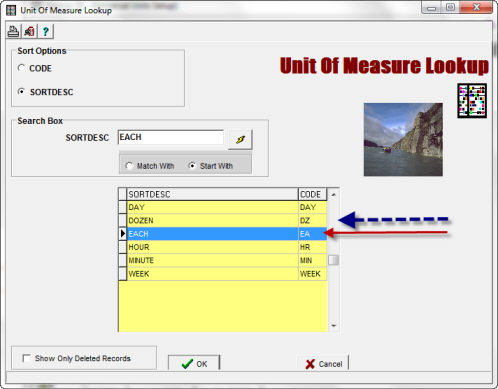
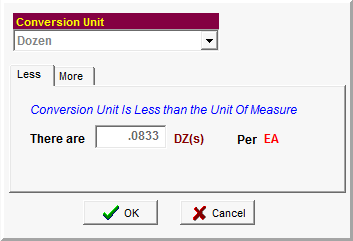
Create whatever Unit denominations are necessary -- to encompass both Inventory itself and Purchasing:
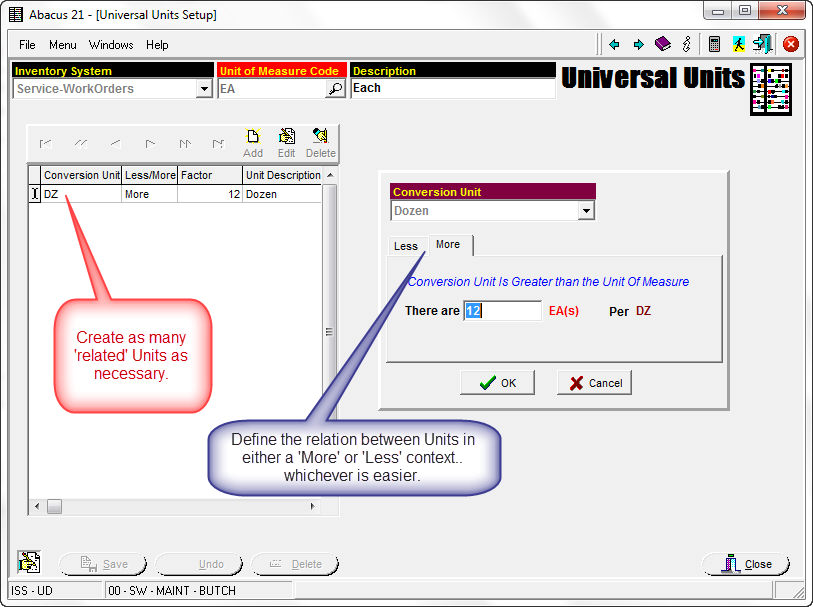
In the example above, the 'Less' context is not intuitive (so the 'More' context should be used):
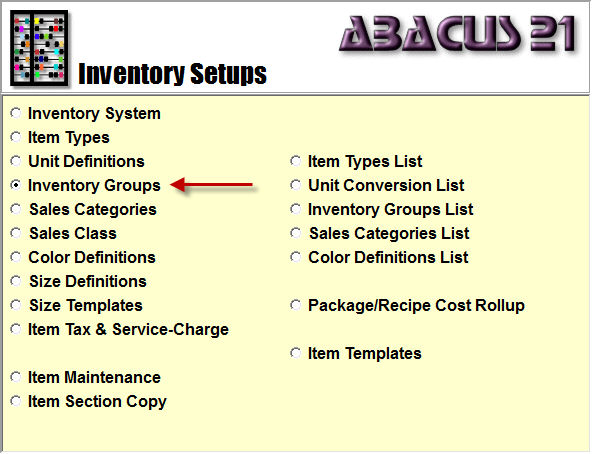
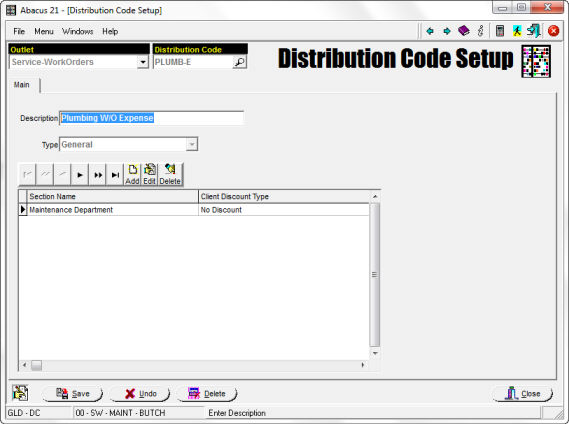
Inventory Groups are more granular than Item-Types... and are used for classifications for Physical Inventory, Inventory-Valuation, and for associating TOPS affiliations... and, if TOPS-active, the Distribution-Code to use when deriving the contra-Inventory Account for WorkOrder Parts consumption -- as derived from Inventory-Adjustments.
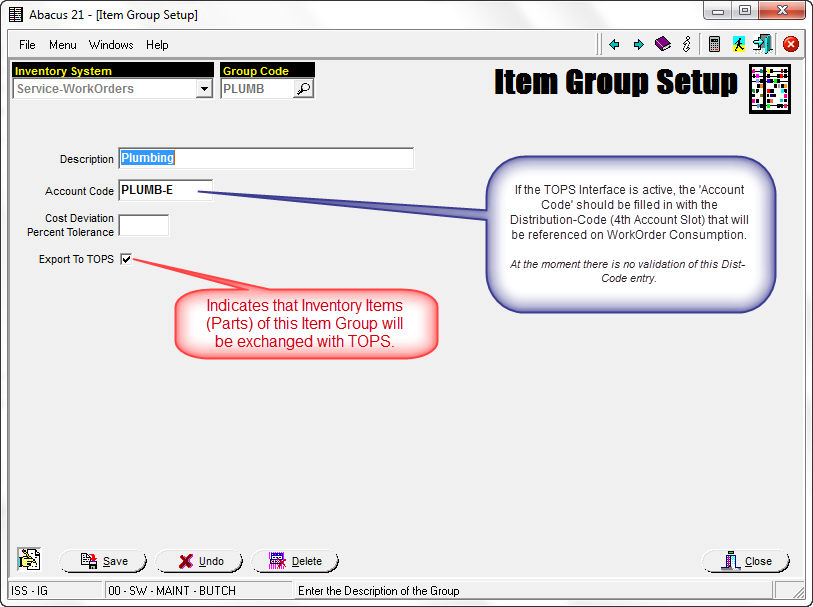
The Percent Tolerance is used to define the default %-Variance (on 'New Cost' vs. 'Last Cost' that will be tolerated on Items affiliated with this particular Item Inventory Group.
This feature is currently inactive...
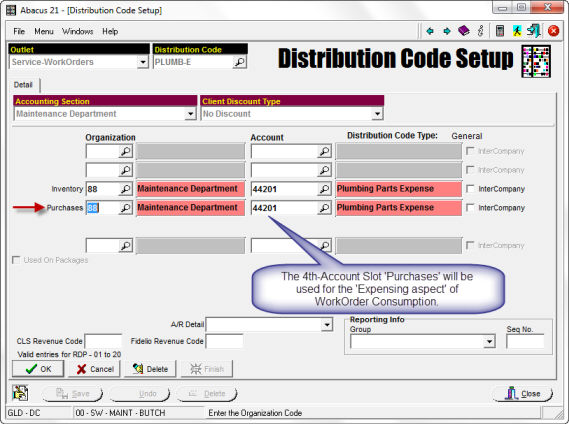
Below is the Distribution-Code Screen associated with the PLUMB-E code:
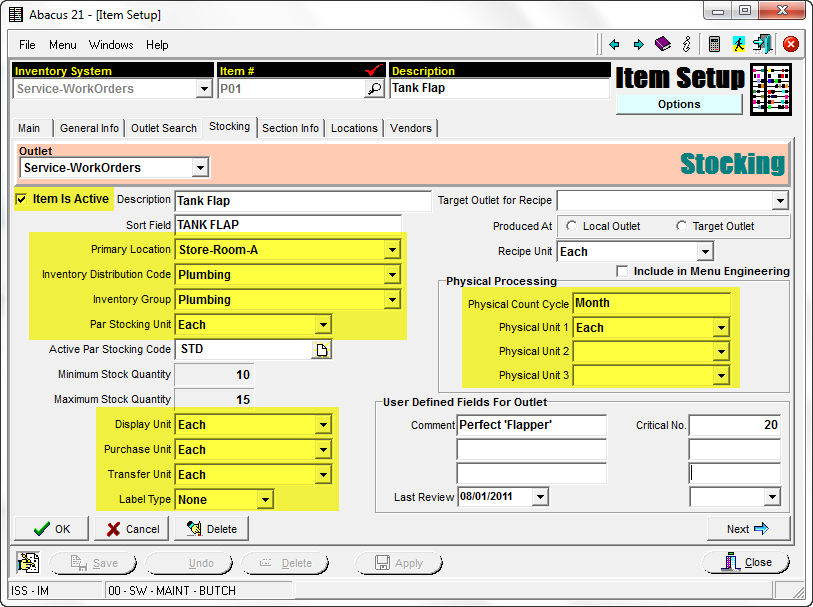
This is the Item Main-tab.. with critical fields highlighted in 'yellow':
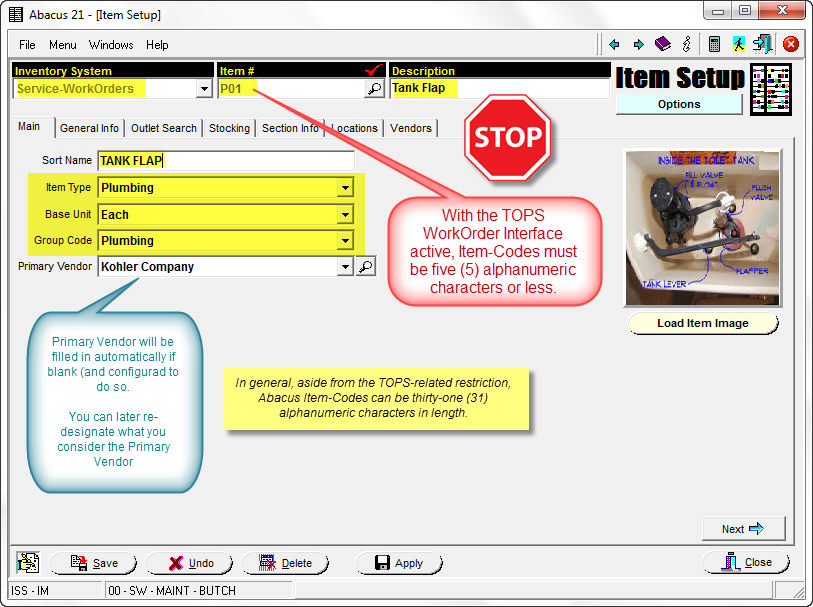
Note that because of TOPS restrictions, Item-Codes created here must be five (5) alphanumeric characters or less.
This is the Item Stocking-tab Screen... with the critical fields highlighted in 'yellow':
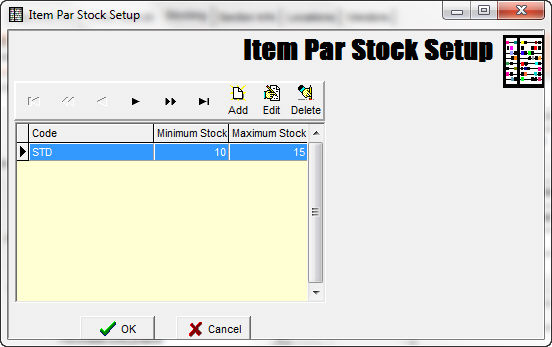
One or more Par-Stock Styles may be set up (defined in terms of the Par Stocking Unit):
The Locations tab... which displays the Quantities related to each Location:
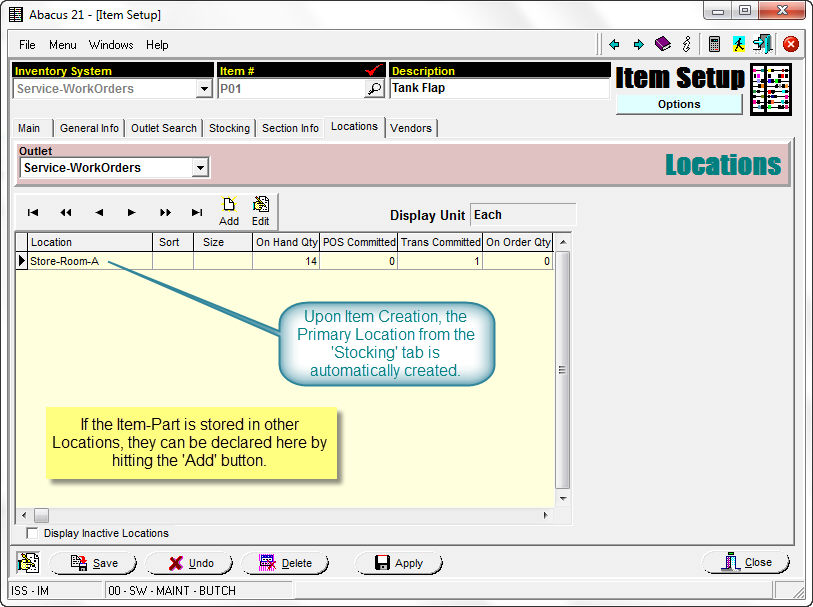
The 'Sort' field is "notational"... but can be used to pinpoint Shelf-Bin locations within a Location -- not explicitly, but rather for orienting the Items more-conveniently on the Physical Count Sheets.
The 'Size' field comes into play if you have licensed Abacus 21 "Sizing" sub-module -- which tracks Inventory by Sizes.
Note: The System actually provides for alternative methods of Pricing-Costing Parts in TOPS -- beyond the Weighted-Average-Cost (WAC) method illustrated above:
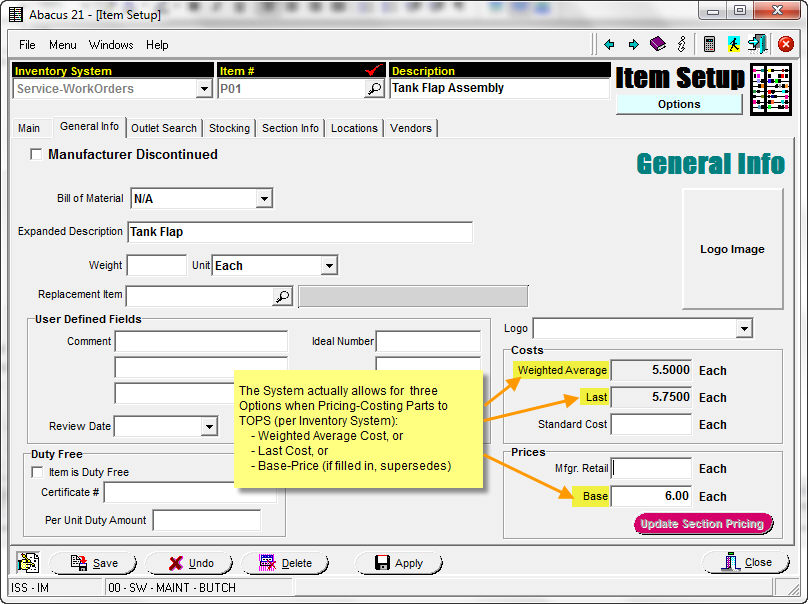
The general method (per Inventory System) is based on a setup: Weighted-Average-Cost (WAC) or Last-Cost.
If a Base-Price happens to be filled in (on the Item Maintenance 'General Tab'), then it overrides the System-setting of WAC or Last-Cost -- for that particular Item-Part.
See Inventory for a more thorough discussion of Inventory Management.
Handheld WorkOrder Processing PC Setup (WorkOrder Control Center) -
The Handheld WorkOrder Processing programs are designed to be able to pull open WorkOrders and all Parts information from a TOPS database. The information is then transferred to a Handheld Unit... where the WorkOrder can be selected and Parts that are needed for the WorkOrder can be “scanned” and added to the WorkOrder.
When all of the necessary Parts have been scanned, the User then transfers the data from the Handheld Unit to the TOPS Database.
Abacus Installer Note: All the programs reside in S:\Installers\Symbol\Files .
WorkOrder Control Center -
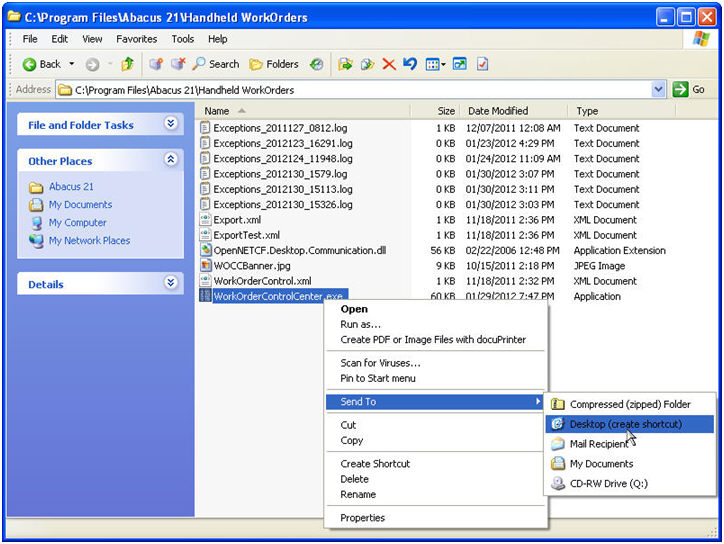
To install the WorkOrder Control Center, copy the WorkOrderControlCenter.zip file to the Customer's workstation and unzip the files into the desired directory. (This can be anywhere, but usually under Program Files – Abacus 21, create a directory “Handheld Workorders”)
At this point, create a shortcut on the Desktop to the WorkOrderControlCenter.exe that can be used to launch the Control Center.
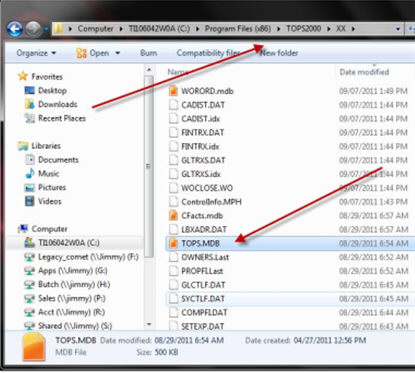
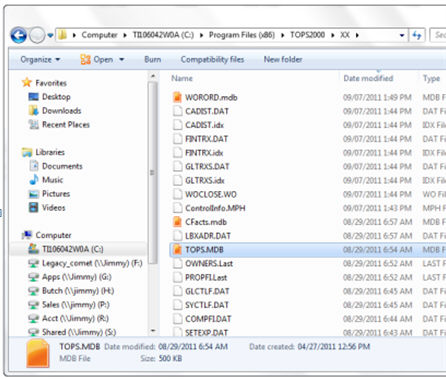
When the WorkOrder Control Center is launched for the first time, the User will be prompted for the Database path for the TOPS database.
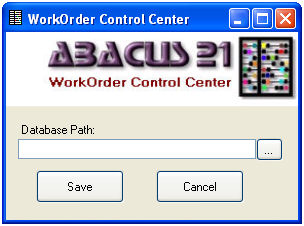
Select the location of the WORORD.mdb file for TOPS and then click the 'Save' button.
Refer to the On-Line Documentation for running the program.
Handheld WorkOrder Processing - Handheld Unit Installation -
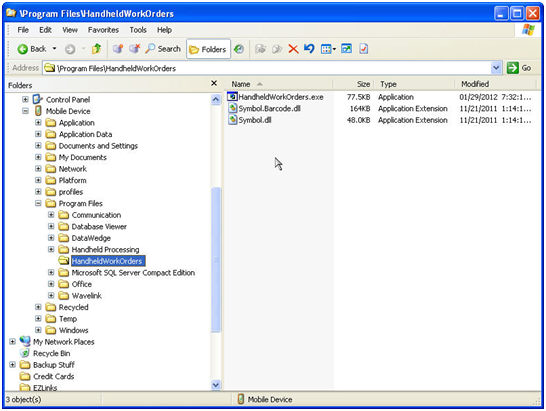
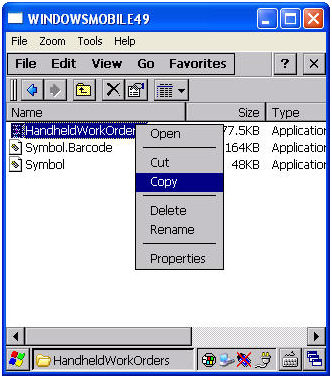
Unzip HandheldWorkOrders.zip to the local PC that is attached to the Handheld.
Using Windows Explorer on the PC, copy the files to the Handheld. Anywhere will work, but if not using an SD card, it is recommended that you create a folder under Program Files called “HandheldWorkOrders”.
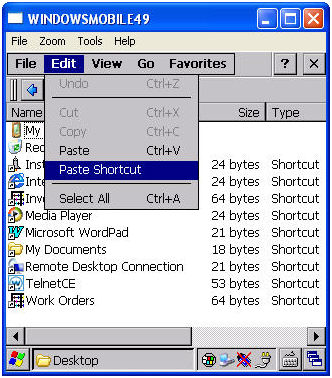
3. On the Handheld, create a Desktop shortcut and you’re done with the installation.
The Windows Mobile Developer Toys (provided by Microsoft™) contain a useful tool for troubleshooting issues with Handheld Units (Symbol, Motorola, etc).
This Utility is the ActiveSync Remote Display. It can be used to view and control the Handheld Unit from a PC (provided that the Unit is connected to the PC and powered on).
Abacus Installation Note: The installation package for the Windows Mobile Developer Toys can be found in the “S:\Installers\Symbol\Files To Send\Remote Viewer” directory.
Installing Windows Mobile Developer Toys:
Copy the WindowsMobilePowerToys.msi file to the Workstation that the Handheld Unit will be connected to.
Double-click the WindowsMobilePowerToys.msi Installer to start the installation process.

Click 'Next'...
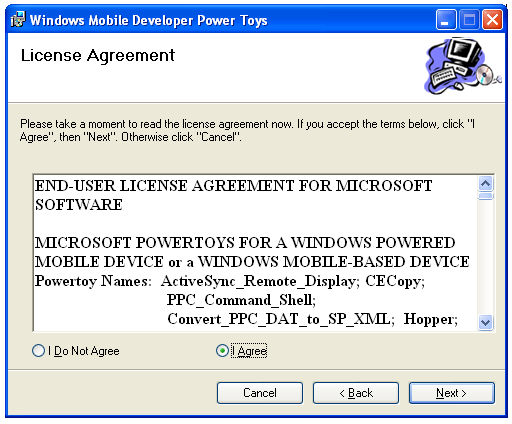
Select the “I Agree” option and Click Next...
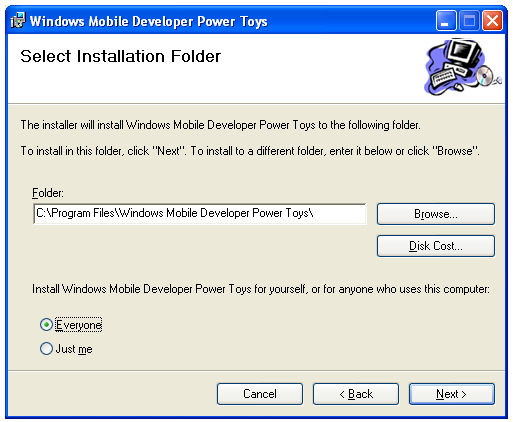
Select the location to install the program to.
Choose the “Everyone” option so that any users on the workstation can run the Remote Viewer Utility.
Click 'Next'.
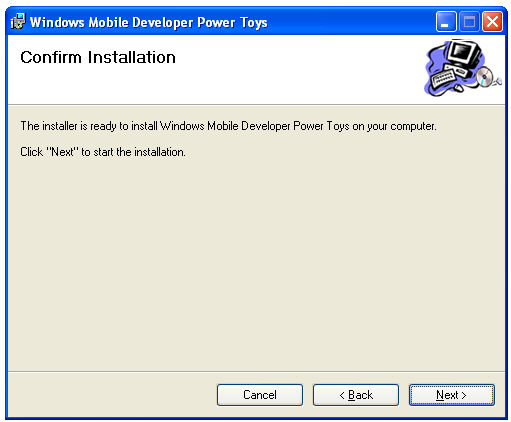
Click 'Next' again. The Windows Mobile Developer Power Toys will now be installed.
Click the 'Close' button to complete the installation process.
Setting up the Handheld Unit to allow Remote-Viewing -
Connect the Handheld Unit to the PC and power on the Handheld Unit.
Copy the cerdisp2.exe executable file from the PC to the Handheld Unit.
Note: If the default installation path was used when installing the Power Toys, this file can be found in the “C:\Program Files\Windows Mobile Developer Power Toys\ActiveSync_Remote_Display\devices\wce400\armv4”
Copy the file to the root “\” directory on the Handheld Unit.
Using the Remote-Viewer Utility -
NOTE: The Handheld Unit must be connected to the PC and powered on for the Remote Viewer Utility to function.
From the Workstation, click on Start-Programs-ActiveSync Remote Display.
A message similar to the screen below may appear. This is a normal warning. Click 'OK' to continue.
The ActiveSync Remote Display will now show the Screen from the Handheld Unit itself. The User will have full control of the Handheld Unit at this point.