
The Handheld Processing programs allow for Physical Count, Requisitions, and Purchasing information to be input on a Handheld Unit and then imported into System 441.
This Section describes the following specific functionality:
![]()
Using the Handheld Processing Programs -
Click on 'Start', then click Programs and select the Handheld Processing icon to start the Handheld Processing program on the device.
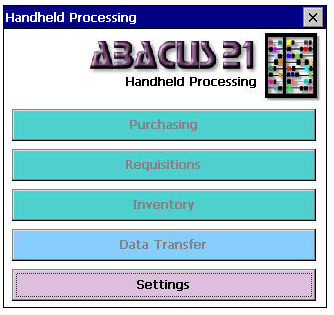
When the Handheld Processing program is started for the first time, the only button that will be enabled is the 'Settings' button.
Click on the 'Settings' button to set the defaults for the unit.
NOTE: The Purchasing, Requisitions, and Inventory buttons will be disabled if data has not yet been imported. These buttons will also be unavailable if either a valid security file is not found, or the module has not been licensed.
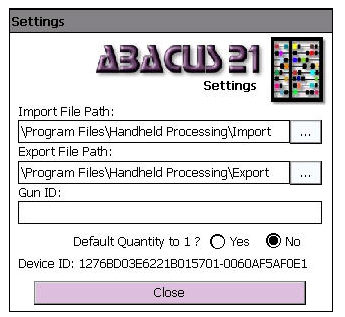
Import File Path – Select the path (on the device) where the data files from System 441 will be imported into the program. Click on the … button to browse for the path.
Export File Path – Select the path (on the device) where the data files from the device to be imported into System 441 will be stored. Click on the … to browse for the path.
Gun ID – Input the Unique ID for this unit. NOTE: Each device must be defined with a unique Gun ID. This ID will be used to identify which device data has been imported from or exported to.
Default Quantity to 1 – Should the Quantity always be set as 1 when inputting item information into the Inventory (Physical Count), Requisitions, and Purchasing screens?
Device ID – This is the Device ID that is “hard-coded” into each unit by the Manufacturer.
When a new device is being installed, contact the Abacus 21 Support Department with the Device ID for the Unit that is being setup. This code is needed to setup the License file for each gun.
After completing the settings, click on the 'Close' button to save any changes and return to the main screen.
After the settings have been defined for the device, data must be imported into the unit from System 441. Click on the 'Data Transfer' button from the main screen.
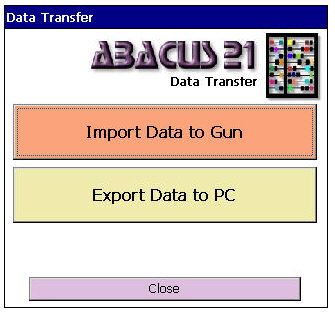
Import Data to Gun – Import Item and Location information from System 441 that has already been transferred to the “holding” location on the Handheld device by the Handheld Control Center.
Export Data to PC – Export Physical, Requisition, and Purchasing data to the “holding” location on the unit. The information will then be transferred to the host PC by the Handheld Control Center.
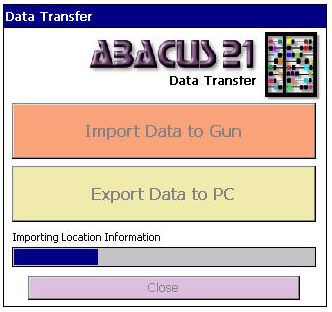
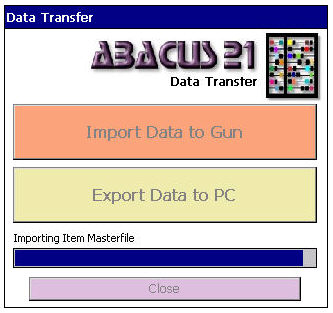
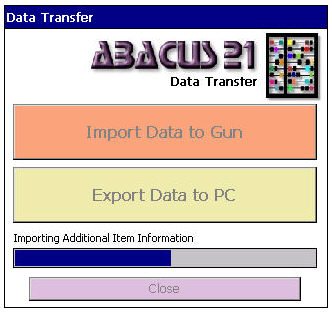

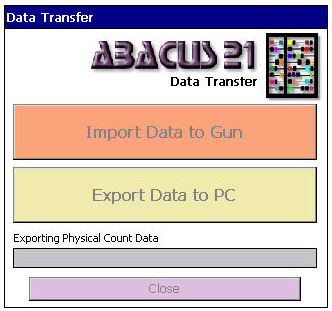
Click on the 'Close' button to return to the main Menu screen.
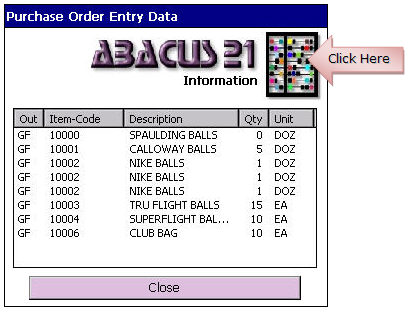
Click on the 'Purchasing' button from the Main Menu to enter the Purchase Order Entry system.
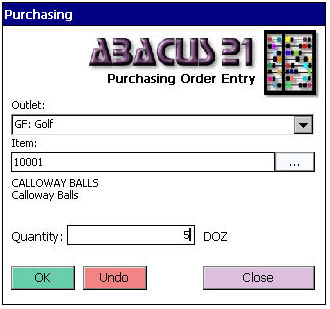
Outlet – Select the Outlet for which the Purchase Order is being. Note: Only Outlets that have been licensed will appear in the drop-down box. If a unit is licensed only for Retail Purchasing, only Retail Outlets will show.
Item – Input the Item Code to add to the Purchase Order.
Item Code can be entered manually (on the keyboard of the unit), by clicking on the “soft keyboard” in the lower right corner of the screen, by scanning the Barcode on the item, or by using the Item Search (see Item Search Section).
Both the standard Description and the Extended Description for the Item Code selected will appear below the Item Code box.
Quantity – If the “Default Quantity to 1” option has not been set in the Settings screen, the Quantity for each entry will need to be entered here. If the “Default Quantity to 1” option has been set, the Quantity will always be set to 1.
OK – Click the 'OK' button, or press 'Enter' on the Keyboard to input the next Item.
Undo – Click on the 'Undo' button to return to the Item Code box and not save the current Item information.
Close – Click on the 'Close' button to return to the Main Menu.
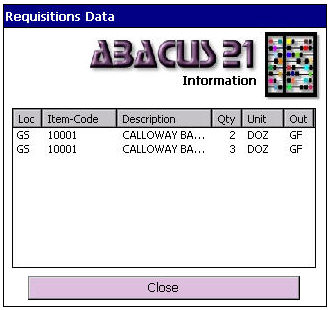
Click on the 'Requisitions' button from the main Menu screen to enter the Requisitions Entry system.
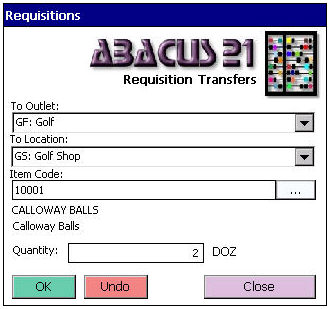
To Outlet – Select the Outlet that the Item is being transferred to. Note: Only Outlets that have been licensed will appear in the drop-down list.
To Location – Select the Location that the item is being transferred to. Only Locations for the selected Outlet will appear.
Item Code - Input the Item Code to add to the Requisition.
Item Code can be entered manually (on the keyboard of the unit), by clicking on the “soft keyboard” in the lower right corner of the screen, by scanning the Barcode on the item, or by using the Item Search (see Item Search Section).
Both the standard Description and the Extended Description for the Item Code selected will appear below the Item Code box.
Quantity - If the “Default Quantity to 1” option has not been set in the Settings screen, the Quantity for each entry will need to be entered here. If the “Default Quantity to 1” option has been set, the Quantity will always be set to 1.
OK – Click the 'OK' button, or press 'Enter' on the Keyboard to input the next Item.
Undo – Click on the 'Undo' button to return to the Item Code box and not save the current Item information.
Close – Click on the 'Close' button to return to the Main Menu.
Click on the 'Inventory' button from the Main Menu to enter the Physical Inventory system.
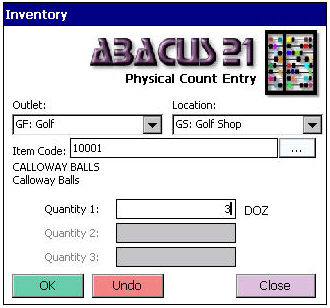
Outlet – Select the Outlet for which the Physical Count of Items is to be taken. Note: Only Outlets that have been licensed will appear in the drop-down list.
Location – Select the Location for the Items that are being counted. Only Locations for the selected Outlet will appear.
Item Code - Input the Item Code to add to the Physical Count.
Item Code can be entered manually (on the keyboard of the unit), by clicking on the “soft keyboard” in the lower right corner of the screen, by scanning the Barcode on the Item, or by using the Item Search (see Item Search Section).
Both the standard Description and the Extended Description for the Item Code selected will appear below the Item Code box.
Quantity 1 - If the “Default Quantity to 1” option has not been set in the Settings screen, the Quantity for each entry will need to be entered here. If the “Default Quantity to 1” option has been set, the Quantity will always be set to 1.
Quantity 2 - If the “Default Quantity to 1” option has not been set in the Settings screen, the Quantity for each entry will need to be entered here. If the “Default Quantity to 1” option has been set, the Quantity will always be set to 1. This option is only enabled for Items that have 2 or more Inventory Units defined.
Quantity 3 - If the “Default Quantity to 1” option has not been set in the Settings screen, the Quantity for each entry will need to be entered here. If the “Default Quantity to 1” option has been set, the Quantity will always be set to 1. This option is only enabled for items that have 3 Inventory Units defined.
OK – Click the 'OK' button, or press 'Enter' on the Keyboard to input the next Item.
Undo – Click on the 'Undo' button to return to the Item Code box and not save the current Item information.
Close – Click on the 'Close' button to return to the Main Menu.
The Physical Inventory, Requisitions, and Purchasing systems all have an Item Search button located to the right of the Item Code box. Click on this button to search for an Item.
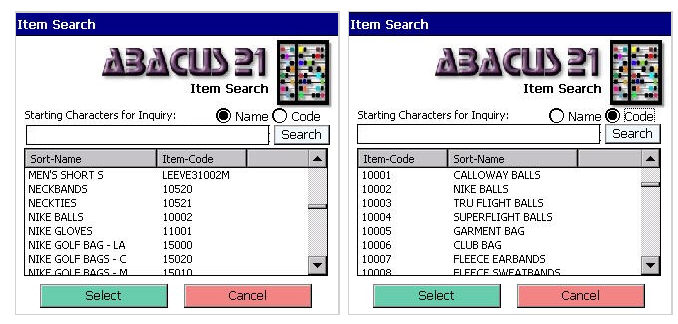
When the Item Search window opens, all Items that have been imported into the Handheld unit will be displayed in Sort Name order.
Starting Characters for Inquiry – Input the starting characters to look for in either the Sort Name (when sorted by Name) or the Item Code (when sorting by Code). The first match will be automatically highlighted in the search box.
Name – Click this option to sort the Items by Sort Name. (This is the default option.)
Code – Click this option to sort the Items by Item Code.
Select – Select the highlighted Item from the list and use it in the application that the search was called from (Physical Inventory, Requisitions, or Purchasing)
Cancel – Do not select any Item, return to the previous screen.
Each of the sub-modules in the Handheld Processing System allows the User to preview the data that has already been input into the Unit.
 From any of the three sub-module
screens (Physical Inventory, Purchasing, or Requisitions), click on the
Abacus icon in the upper-right corner to view the data that is currently
stored in the unit.
From any of the three sub-module
screens (Physical Inventory, Purchasing, or Requisitions), click on the
Abacus icon in the upper-right corner to view the data that is currently
stored in the unit.
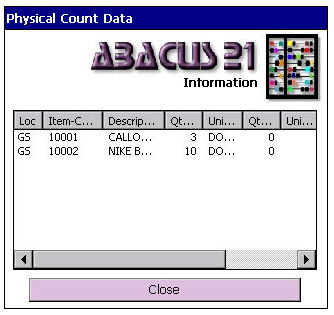
When the Preview screen first opens, the Items are sorted by the order that they were input in. To sort by other options, click on the column header to sort by that column.
Example: To sort by Item Code, click on the Item Code column header.
Click on the column header again to sort by descending order.
Each column can also be expanded (stretched for dragging its border) to show information that may be truncated by the default column size.