![]()

![]()
The following section leads you through a Quick-Start for Loading the Software on the Motorola-Symbol Guns.
Prerequisites for the Workstations:
.Net Framework 2.0
Microsoft ActiveSync™ (note Windows7™ & Windows8™ Workstations have built-in provisions for this that do not require the use of ActiveSync™ per-se)
Handheld Control Center
Abacus 21's System 441 Client
Notes regarding Motorola-Symbol Gun Installation within Windows7™ or Windows8™ Workstation environments (without ActiveSync™):
Note: This document is written COMPLETELY independent of 441 to demonstrate the difference between installing Handhelds on Windows 7/8 versus having to install on Windows XP and prior versions of Windows using ActiveSync™. ActiveSync™ is no longer supported in Windows 7 and 8.
To connect to Windows 7 or 8:
Make sure the PC is up and running and the user logged on is AN ADMINISTRATOR.
Connect the gun the external power and then plug it into the USB port of the Windows 7/8 computer. The Handheld should come on automatically.
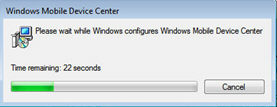
After a while (this varies with the 'prowess' of your PC) Windows will try to install the Device. (If it does not, you may have to run Windows Update manually to install the drivers.)

The “Device is ready to use” prompt will show that the drivers have loaded, but as you can see, the Windows Mobile Device Center is still loading.
You shouldn’t need to, but if the process says it failed along the way, you may need to unplug the USB cable and plug it back in.
You shouldn’t need to, but if the Windows Mobile Device Center does not run automatically, it can be downloaded from here:
http://support.microsoft.com/kb/931937
Scroll down about 1/4 page for the download links.
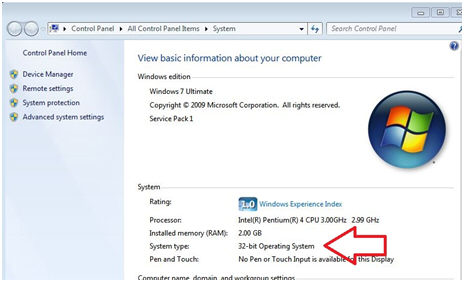
Right-click on My Computer and go to Properties to determine if you need the 32-bit or 64-bit version – you want whichever one matches the version of Windows.
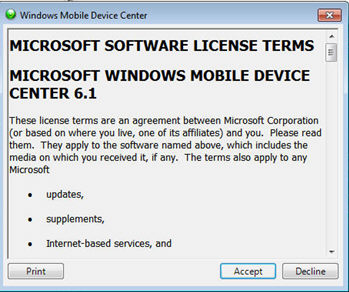
Accept the Agreement:
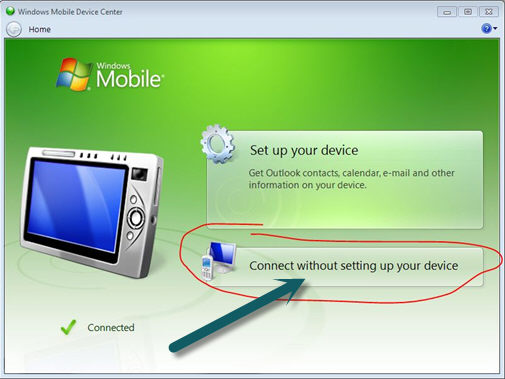
Choose “Connect without setting up your Device”:
When you see “Connected”, just use the “x” in the upper-right corner to close the box:

The device will now show in My Computer or File Explorer under “Portable Devices” and can be browsed like any USB device:
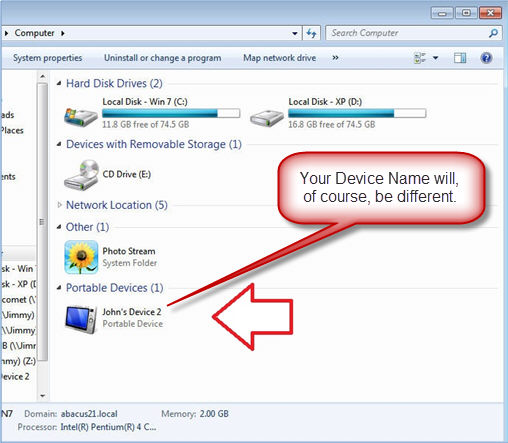
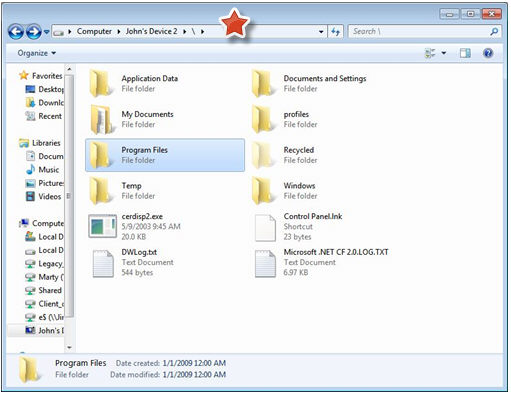
The Device can be browsed like any USB drive:
Quick-Start for loading Programs on Handheld -
Turn on the Symbol unit.
Perform a cold boot on the Handheld Handheld unit by holding down the 1 and 9 key and select the Power button.
For Mono Units Only - On the unit, click Start-Settings-Control Panel-System. Click on the Memory tab and adjust total program memory to a minimum of 19184KB.
Plug in the Handheld unit to the PC; it will start ActiveSync. (See above for PC-Environments Windows7™ and Windows8™ above that do not require ActiveSync™.)
Click "Cancel Partnership".
Start a Windows Explorer window (Start-Run and then input the path where the OSUpdate folder is located, i.e. \\servername\Installs\Handheld Updates) and copy OSUpdate folder from "Color Unit" folder or "Mono Unit" folder (based on Unit type) to clipboard.
Click on Explore button in ActiveSync window and paste OSUpdate into \Storage Card folder on the device.
For Mono Units Only - On the unit select My Device, Storage Card, OSUpdate and run the program 30XXc50AenMono_SD. When update is done loading, follow on screen instructions to calibrate unit.
For Color Units Only - On the unit select My Device, Storage Card, OSUpdate and run the program 30XXc50AenColor_SD. When update is done loading, follow on screen instructions to calibrate unit.
A New Partnership window will have started on the PC. Click on Next, uncheck all boxes, click next, and then click Finish.
Start a Windows Explorer window (Start-Run and input the location where the SQL Server Compact Install files are located, i.e. \\servername\Installs\Handheld Updates) and copy sqlce.wce5.armv4i.cab to clipboard.
Click on Explore button in ActiveSync window and paste sqlce.wce5.armv4i.cab into \Storage Card folder on the unit.
Start a Windows Explorer window (Start-Run and input the location of the Handheld SD Card Updates, i.e. \\servername\Installs\Handheld Updates\SD Card Fix) and copy all files to clipboard.
Click on Explore button in ActiveSync window and paste files into \Application folder on the handheld device.
On the unit, select My Device-Application and run the SkipCopy.reg program. Click Yes on the dialog box when prompted.
After the fix completes, click on Start-Programs-Warm Boot to restart the unit.
On the unit, select My Device-Storage Card. Click on the sqlce.wce5.armv4i.cab program. Click OK.
For Mono Units Only - On the unit, click Start, Settings, Control Panel, System, Memory tab and adjust program memory to a maximum of 14024.
After the fix completes, click on Start-Programs-Warm Boot to restart the unit.
Power unit off
Load (if not already) current versions of Hand-Held Processing and Compact Net Framework 2.0 on the workstation PC
Power unit on.
In ActiveSync window, click on Tools-Add/Remove Programs. Check Abacus Handheld Processing and Microsoft .Net CF 2.0. Uncheck "install Program into the Default Folder Location" option. Once you click OK, it will ask for Destination Media. Select Storage Card and click OK. When done, click OK on the Workstation.
On the Unit, finish the install by clicking OK on the Abacus 21 Handheld Processing window and then click OK on the MS .Net CF 2.0.
For Mono Units Only - On the unit, click Start, Settings, Control Panel, System, Memory tab and adjust program memory to 18184.
After the fix completes, click on Start-Programs-Warm Boot to restart the unit.
After the installation process is completed on each device, please launch the Handheld Processing program on the unit and go into the Settings Screen. A new option will now appear on the settings screen for the "Database Path". This should be set to a location on the SD Card.
Set GunID and Quantity 1 or not.
Click Close button to save changes.
Close Handheld Processing Program on device.
Power unit off.
On PC, start Handheld Control Center.
Power unit on.
Once License-Key and Gun-Id display, close Handheld Control Center.
Power unit off.
Disconnect Handheld device from PC.
Change Time-out Settings on Unit from default to 5-Minutes for Battery Power.
Installation of Programs on New Motorola-Symbol Handheld - Updated May 25, 2012
Perform a cold boot on the Motorola-Symbol Handheld unit by holding down the 1 and 9 key and select the Power button.
Turn on the Unit
Plug in the Unit to the PC... it will start Active-Sync.
Start a Windows Explorer window (Start-Run and then input the path where the OSUpdate folder is located, eg. \\servername\Installs\Symbol Updates) and copy OSUpdate to the Clipboard.
Click on Explore button in Active-Sync window and paste OSUpdate into \Storage Card folder on the device.
A New Partnership window will have started on the PC. Click on Next, un-check all boxes, click Next, and then click Finish.
Start a Windows Explorer window (Start-Run and input the location where the SQL Server Compact Install files are located, eg. \\servername\Installs\Symbol Updates) and copy sqlce.wce5.armv4i.cab to the Clipboard.
Click on Explore button in Active-Sync window and paste sqlce.wce5.armv4i.cab into \Storage Card folder on the Unit.
Start a Windows Explorer window (Start-Run and input the location of the Symbol SD Card Updates, i.e. \\servername\Installs\Symbol Updates\SD Card Fix) and copy all files to the Clipboard.
Click on Explore button in Active-Sync window and paste files into \Application folder on the handheld device.
On the unit, select My Device-Application and run the SkipCopy.reg program. Click Yes on the dialog box when prompted.
After the Fix completes, click on Start-Programs-Warm Boot to restart the Unit.
On the unit, select My Device-Storage Card. Click on the sqlce.wce5.armv4i.cab program. Click OK.
After the Fix completes, click on Start-Programs-Warm Boot to restart the Unit.
Power the Unit off.
Load (if not already) current versions of Hand Held Processing and Compact Net Framework 2.0 on the Workstation PC.
Power the Unit on.
In the Active-Sync window, click on Tools-Add/Remove Programs. Check Abacus Handheld Processing and Microsoft .Net CF 2.0. Once you click OK, it will ask for Destination Media. Select Storage Card and click OK. When done, click OK on the Workstation.
On the Unit, finish the install by clicking OK on the Abacus 21 Handheld Processing window and then click OK on the MS .Net CF 2.0.
After the Fix completes, click on Start-Programs-Warm Boot to restart the Unit.
After the installation process is completed on each device, please launch the Handheld Processing program on the Unit and go into the Settings Screen. A new option will now appear on the settings screen for the "Database Path". This should be set to a location on the SD Card.
Set GunID and Quantity 1 or not.
Click Close button to save changes.
Close Handheld Processing Program on Device.
Power Unit off.
On PC, start Handheld Control Center.
Power Unit on.
Once license key and gun id display, close Handheld Control Center.
Power the Unit off.
Disconnect Motorola-Symbol device from PC.
For further assistance contact Abacus 21 Support.
Installation -
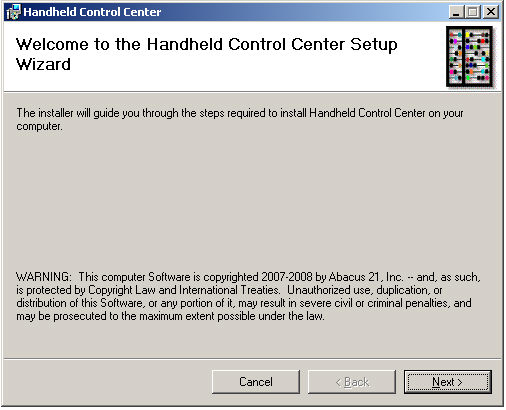
Double-click the ControlCenterSetup.msi to start the Installation process.
Click the 'Next' button to continue the Installation process.

On the License Agreement screen, read the License Agreement information. Click on the “I Agree” option (if you agree with the License terms) and then click the 'Next' button to continue the installation process... or click on the 'Cancel' button to exit the installation.

The Installation process will default in an Installation directory of “C:\Program Files\Abacus 21\”. Either use the default directory (recommended) or select another directory to install the programs to.
Click the 'Next' button to continue.
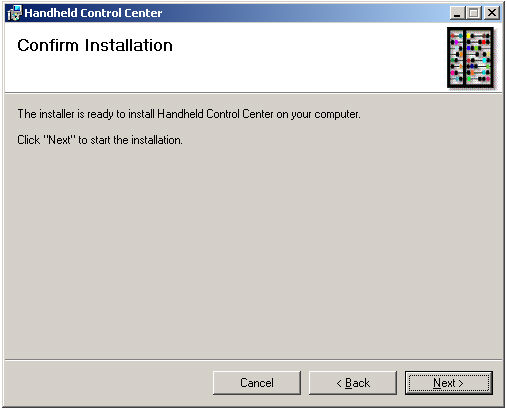
The Handheld Control Center is now ready to be installed. Click the 'Next' button to continue the installation.
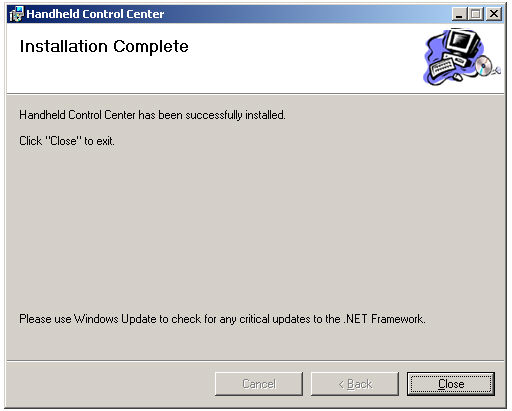
At this point, the installation of the Handheld Control Center is complete. Click on the 'Close' button to complete the process.
Note: As stated on this screen, please run Windows Update (or Microsoft Update) to check for any critical updates to the .NET framework. The Control Center requires that the .NET Framework 2.0 be installed on the workstation.
Pre-Requisites -
Prior to running the Handheld Control Center, verify that the following programs are installed on the Workstation:
Microsoft .NET Compact Framework 2.0 must also be installed (including any updates).
Microsoft ActiveSync™ 4.1 or later
Note that Windows7™ & Windows8™ Workstations have built-in provisions for this that do not require the use of ActiveSync per-se)
Microsoft SQLServer Compact v3.5 must be installed (including any updates).
![]()