
This section provides an example of how to set up and produce Cards with CardFive's Vision level software integrated with Abacus 21's Software.
Note that this is a selected-case example, and may not be directly applicable to your particular needs.
This example is referencing a Member Card that is pre-Printed on the Card Face... with some pre-Printing on the Back of the Card -- supplemented with variable Member-Name, Member-No, and Member-Photo.
This description is divided into three segments:
Overview -
Abacus 21 system 441 integrates with Cardfive™ software to produce Cards of various types. This document discusses production of Member and Guest cards from Client Maintenance.
The System 441 and Cardfive™ applications must both be run independently from separate icons. The two applications may be run from the same PC, separate PC’s, or with Cardfive™ running locally on the PC and Abacus running under Terminal Services.
In the Terminal Services situation – this is considered as running on two separate PC’s -- since Abacus is really running on the Terminal Server.
The communication is accomplished by Abacus 21's placing the Card information into a Microsoft Access™ Database – from where the Cardfive™ then reads the information and places it on the Card.
Cardfive™ then physically produces the card.
The format of the Card(s) will vary from Client to Client and may be produced by Abacus or by the Client.
Setups -
Third-Party Product Installation -
Cardfive™ Vision needs to be installed. Follow instructions provided by Cardfive™.
The Card Printer needs to be connected to the Workstation or the Network (if it was ordered Network-ready).
The printer Drivers need to be installed on the appropriate Workstation.
Follow the instructions provided with the Printer and your Network Support people should configure the Printer sharing if necessary.
The Camera needs to be connected to the Workstation and the Twain Drivers installed as per the instructions provided by the Camera’s Manufacturer.
Integration -
A location on the Network must be found to store the images. This needs to be accessible from both Abacus and Cardfive™.
A place will need to be found on the Server to store the CARD.MDB file. This is the Database that is used by Abacus and Cardfive™ to pass the Client information. This is best placed directly on the Database Server. It can be in a relatively unsecured area because it is only a temporary storage location for the information of the single Person whose Card is about to be produced.
If the Card format(s) are produced by Abacus, these will need to be delivered. This will be a .car file. The Cardfive installation creates a directory tree with an appropriate location for the file(s):
C:\Program Files\Number Five\CardFive Vision\Cards
If you have only a single Card format, the desktop icon for Cardfive™ can point directly to the .car file. Windows will then automatically launch Cardfive™ with the Card format loaded -- thus saving the aggravation of having to manually open the Card format each time.
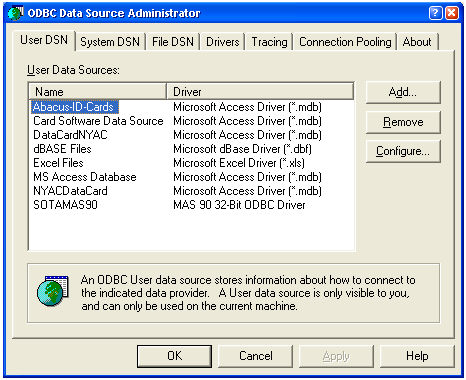
ODBC Data Source -
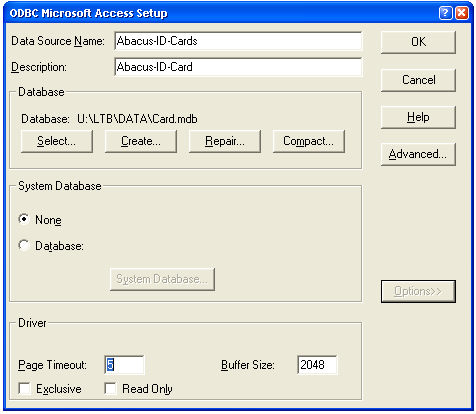
An ODBC Data Source "Abacus-21-Card" will need to be created to work in conjunction with the Microsoft Access (.mdb) driver.
This should point directly to the Card.mdb database.
Place this in User DSN if you want this secured by User or in System DSN if it is to be available to all Users.
If a Password is necessary to get to this, load this into the ODBC definition as well. This is done by pressing the 'Advance' button:
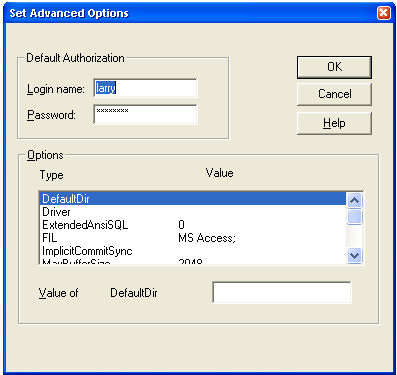
If Cardfive™ is being run locally on a PC and Abacus is being run under Terminal Services, then this is two separate PC's... and the User under Terminal Services will need to have the Data Source defined as well.
Cardfive™ -
You should create a Desktop Shortcut to facilitate easy access to Cardfive™ -- launching directly from the .car file referenced in the Shortcut.... or double-click the .car file.
Be careful to click on the 'image' itself... and not its 'border'. (Move the border to gain access if necessary.)
The location where the captured Images are to be stored is identified in Cardfive™ on the Member Image Control on the Card itself. In Card-View, click on the Member Image Control on the Card. Then, in the Dashboard, expand the Source section:
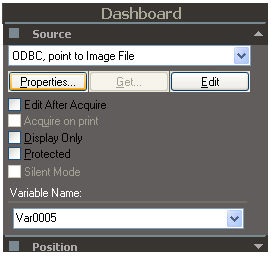
Click on Properties:
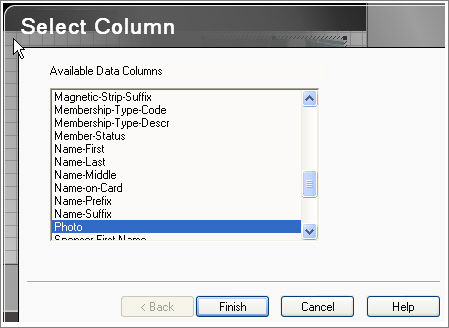
Then click on Finish:
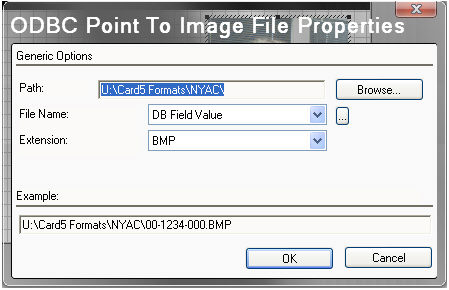
From this screen you can set the path as well as the Image format. This must match the path identified in the Abacus21.ini MemberImages parameter.
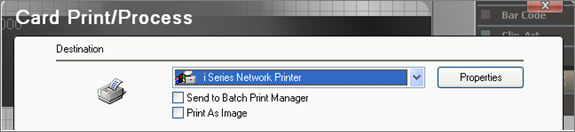
In Card Print/Process (accessed from Files/Card Print) be sure that the 'Print As Image' option is not checked. Printing as an image will cause distortion of all text.
Magnetic Strip Encoding -
If the Cards are to be Magnetically encoded, set the Magnetic Encoding for the appropriate tracks that will be used by your Cards. From the File Menu, take the Card Setup option:
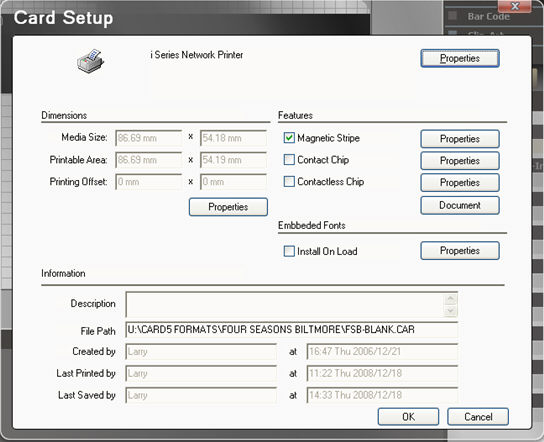
Check the Magnetic Stripe box in the upper-right and set the Properties by hitting the 'Properties' Button to the right:

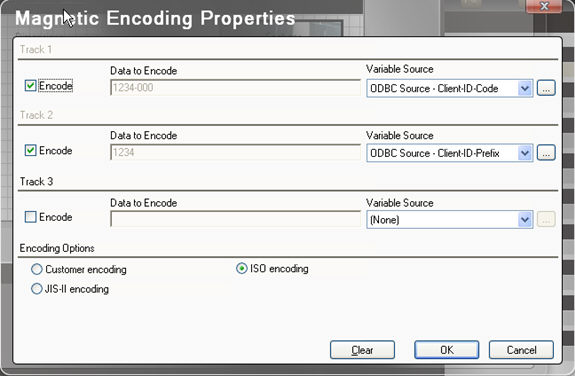
Check whichever Tracks are to be encoded on your Cards.
Then set the Magnetic Track properties by pressing the 'Properties' button below the dimensions settings... and then go to the Magnetic Encoding Tab:
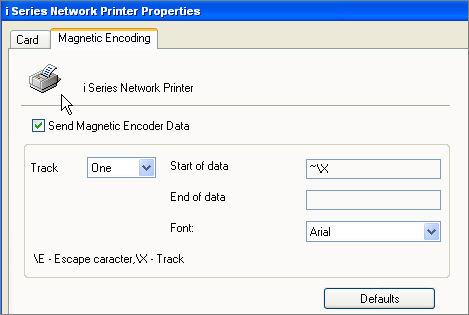
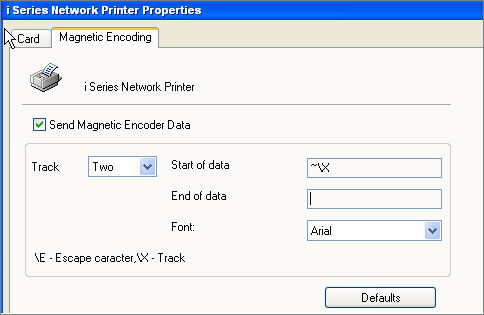
Make sure that the 'Send Magnetic Encoder Data' is checked for the appropriate Tracks and that the 'Start of Data' and 'End of Data' fields are entered as noted above.
Camera Setup -
Make sure the Camera is connected to the Computer (typically via a USB); the Camera must be Twain-Compliant.
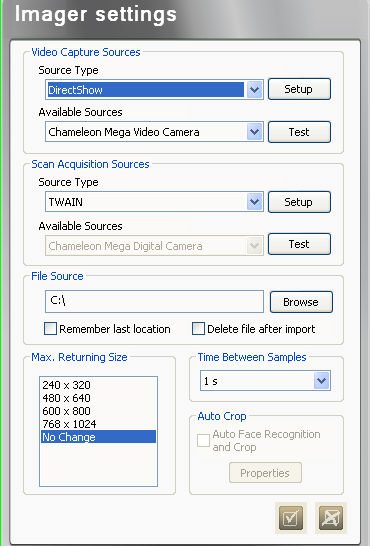
The Camera must also be identified to Cardfive™. To do this, go to the Options menu and select Imager Settings. The settings should be those shown in the screen shot below -- but with your Camera driver noted in Available Sources.
Print Driver -
In the Printer Driver, settings will vary depending upon the Printer being used. Access is available from a number of locations. The aasiest is to go to Files/Card Print and take the 'Properties' button to the right of the Printer name.

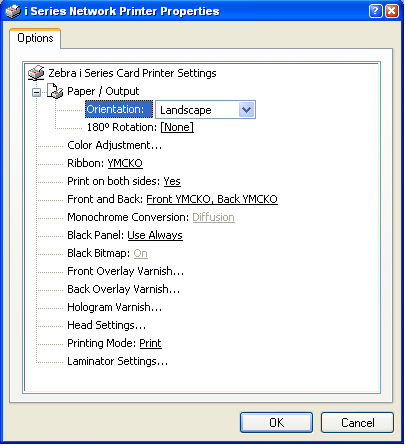
The Ribbon must be set appropriately for the ribbons that you have purchased.
If color is to be printed on both sides, then the appropriate ribbon is YMCKO.
If color is to be printed on the front and black and white on the back – then the appropriate ribbon is YMCKOK.
Front and Back would be set to “Front YMCKO, Back YMCKO” if both sides are in color or “Front YMCO, Back K” if the front is color and the back is black-and-white.
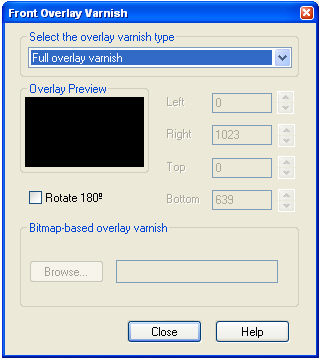
Front Overlay (a protection layer) is usually for the entire face of the Card:
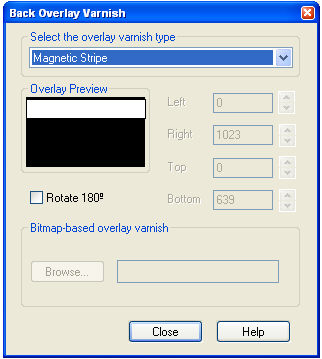
Back Overlay usually does not go over the Magnetic Stripe:
Abacus 21 System-441 Settings -
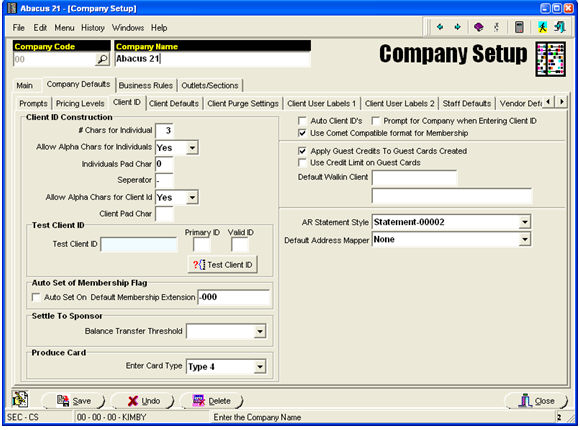
In Company Setup, under Company Defaults/Client ID (lower left), indicate the Card Type to be used.
Abacus 21 Support or Installers will provide the appropriate setting.
In Membership Type Setup, identify the Card face image to be used on the front of the Cards of Members with this type. (This may or may not be necessary based upon the Card Style.)
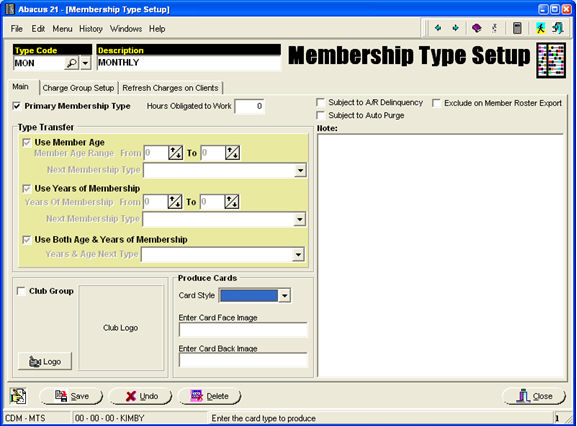
Also in Membership Type Setup identify the Card Type. This will be used for Member vs. Guest or other variations in Card composition. The options and functions will vary based upon Card Style.
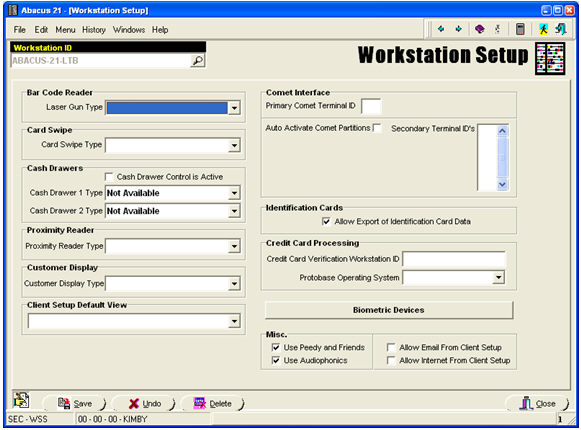
Workstation Setup -
For the Workstation that will be driving the Card preparation process, in the "Identification Cards" area (middle-right), you will need to check the "Allow Export of Identification Card Data" box:
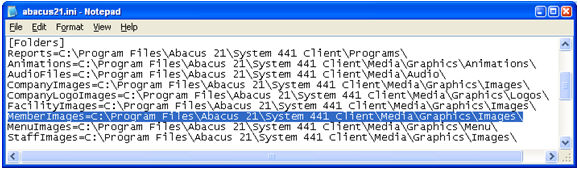
The location where the Images are stored is identified to Abacus in the Abacus21.ini file. This is found in the programs directory. Usually C:\Program Files\Abacus 21\System 441 Client\Programs. The parameter MemberImages needs to carry the complete path to the directory:
Access Database -
A drive will need to be mapped to the directory containing CARD.MDB from the Workstation running Cardfive and the Workstation running Abacus that will be used to drive the Card production. If these are different PCs, they should both be mapped the same. (If Cardfive is being run locally on a PC and Abacus is being run under Terminal Services, then this is two separate PC's... and the User under Terminal Services will need to have the mapping.) This location will be used in the ODBC Data source definition.
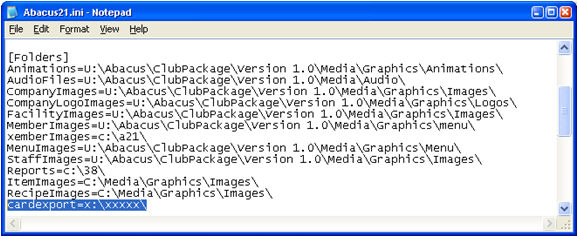
In the Abacus21.ini file used by the Workstation that will be driving the Card preparation process, a line needs to be added to carry the path to the location of the Card Database:
When these setups are completed, you should be able to launch both applications and test the following the steps described in the Operation section.
Please keep copies of the following items in a safe location – so they can be restored if lost or damaged:
CARD.MDB – the interface Microsoft Access database
All Card Face images (or Back Images) – if you have any
All Card format files (.car) – either provided by Abacus or produced locally
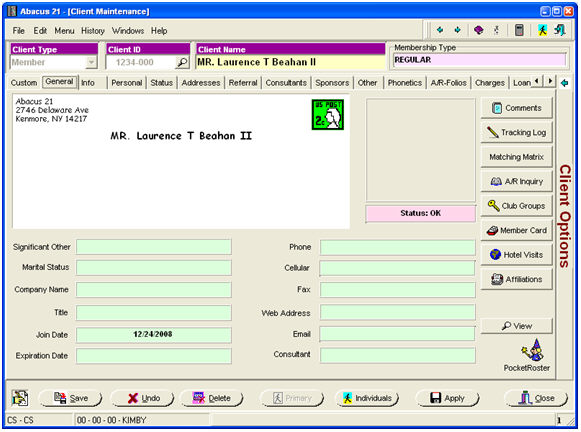
The User will either call up or create the Person who is to get the card in Client Maintenance.
On the middle-right of the screen, select the "Member Card" option:
Create a new Card by hitting the 'Add' button to create a new Card record:
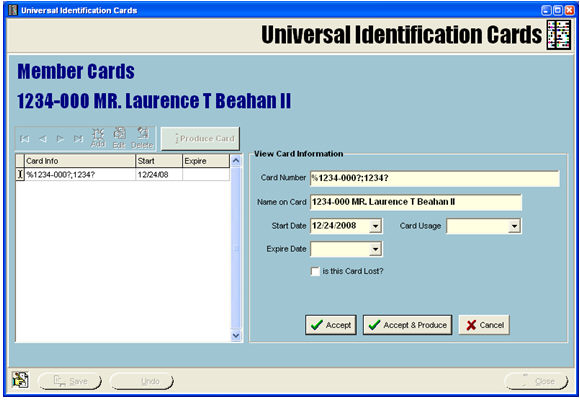
If this is a Guest - the Dates on this screen will be used to print on the Card.
The Start-Date and End-Date can also be used to limit the validity of Usage for Members as well.
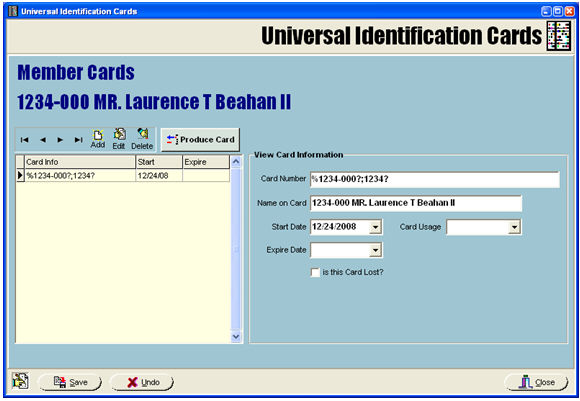
Press the 'Accept and Produce' Button.... or select an existing Card and Press the 'Produce Card' button.
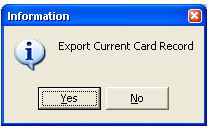
In either case, respond YES to the Export Confirmation message:
Navigate to the Cardfive™ program.
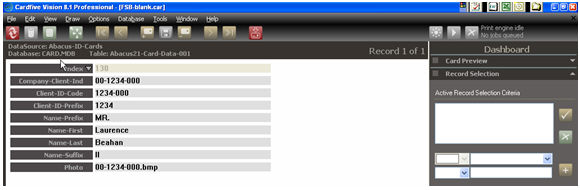
If the Cardfive™ program was already running, go to the Database view by hitting the first icon on the tool bar:

Then, in the Record Selection area on the right side of the screen, hit the Checkmark Button
 to have Cardfive™
refresh its record to that of the newly-exported Member:
to have Cardfive™
refresh its record to that of the newly-exported Member:
At this point, you are ready to capture the Image -- of, if the Image of the Member is already on file, you can just print (skip ahead).
Both of these steps can be performed from either the Database-View or the Card-View.
To get to the Card-View, again hit the first
icon on the Tool Bar --
and you will see the Card Image.
You can flip Card sides by hitting these
buttons on the Tool Bar: 
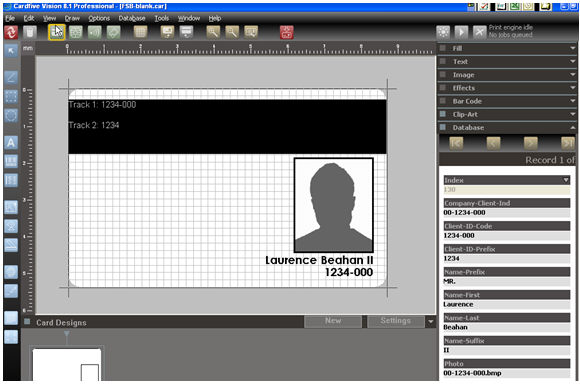
To initiate the Image Capture process, you need to click into the Photo field.
In the example above,
this is in the lower-right (of the back of the Card): 
If record fields are not currently displayed in the Dashboard you will need to expand the Database by clicking on the arrow to the right:

In the Database-View, the field is displayed on the left side of the screen:

In either case you simply hit enter when in the field and Cardfive™ will launch the Camera control software.
The following steps may vary based upon the Camera and Camera Driver in use:
When the Screen displays, take the icon for
PC-Control of the Camera  and the PC-Control screen will
display:
and the PC-Control screen will
display:
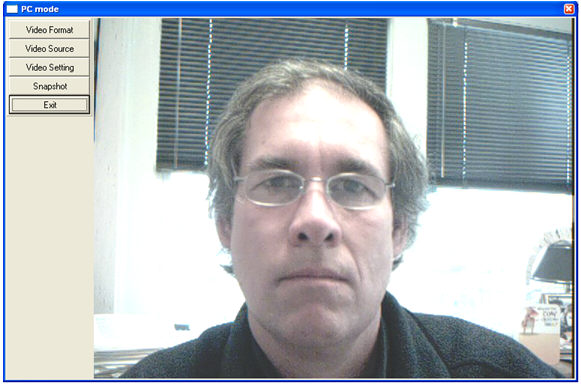
Press the Snapshot button  to
capture the Image. Control
will then be returned to Cardfive™
-- and, if you are in Card-View, you can see the Image on the Card:
to
capture the Image. Control
will then be returned to Cardfive™
-- and, if you are in Card-View, you can see the Image on the Card:
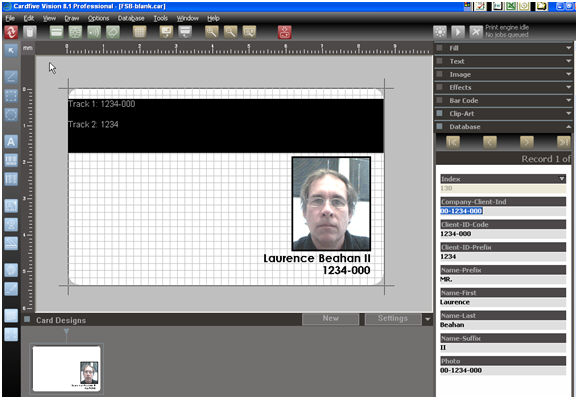
Note: The quality of the Image will depend on the Camera, Camera settings, lighting and -- of course the subject... in this case of this example – no comment.
If you wish to capture a fresh Image – just click into the Photo field and hit 'Enter' again to repeat the process until satisfied.
You can print the displayed Card by clicking
on the 'Print' button in the tool bar  ... or
by going to the File menu at the top of the screen and selecting the 'Card
Print' Option.
... or
by going to the File menu at the top of the screen and selecting the 'Card
Print' Option.