
This program allows for the definition of the Touch Menus that are used within Point-of-Sale.
There are three types of Touch Menus that are used in POS:
Menu (Item)
Modifier
Payment
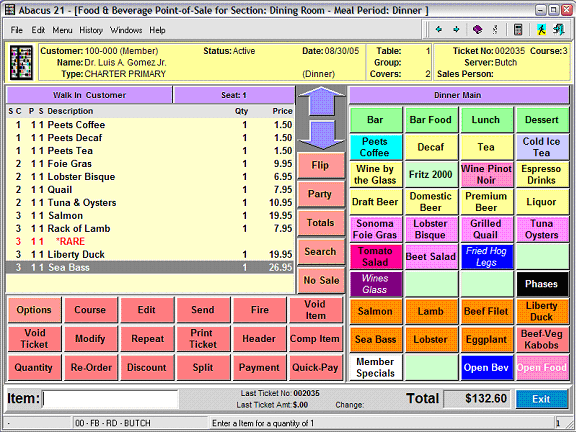
The follow show the main Order Entry screen of Point-of-Sale (for a Food/Beverage style of POS).
The POS Touch Menu portion of the Entry screen is on the right side:
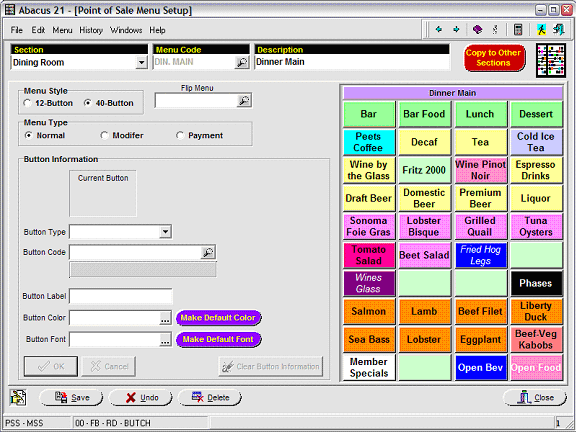
POS Touch Menus are defined within a Section by a Menu Code -- as the screen below illustrates (for the Dining Room's DIN.MAIN Touch Menu):
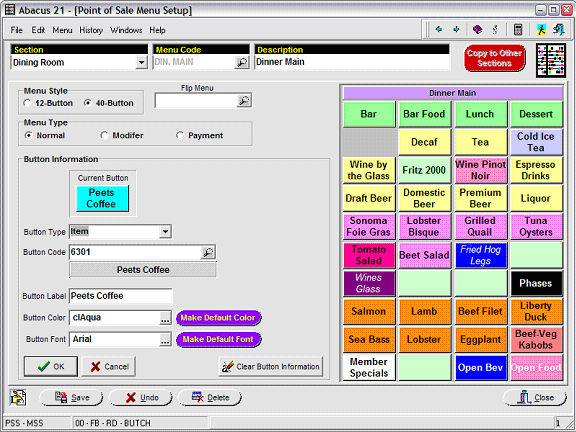
Hitting the 'Peets Coffee' Button at the left end of the 2nd row (of the 40 buttons) shows the following screen:
Section - Enter the respective Section for which the Touch Menu is being built.
Menu Code - Enter a meaningful abbreviation for the Touch Menu.
Menu Style - You can choose to have either 12 or 40 Buttons on the Menu.
Normal Menu-Item Menus and Modifier Menus can be either style.
Payment menus must be of the 12-Button style.
If the 12-Button style is selected, POS will use the extra space on the entry screen to show more information about the Items that are being sold – such as Item Code and Extension.
Food & Beverage Point-of-Sale would more naturally use 40-Button style.
Retail Point-of-Sale Managers may opt for 12-Button style (to show the Item Codes and Amount Extensions).
It is possible to use a mixture of 40-Button and 12-Button styles together -- and with the 'Flip' option (see below), it is also possible to quickly toggle between related ones/styles.
Flip Menu – In POS there is an option to “Flip” the Menu.
This is normally expected to be used when the primary Menu is the 12-Button style so that the additional Item information may be displayed.
The Flip Menu may then be a 40-Button style Menu that will have additional commonly-used Items immediately available to the operator.
Menu Type – There are types of Touch Menus – Normal, Modifier, and Payment.
With each type there are different constraints or requirements.
Normal – This is the normal type that is used for the selling of Items in POS. These Menus may be of 12-Button or 40-Button style.
Modifier – This type is used to allow the operator to select items that are used to modify items that had just previously been sold.
If the Modify Button is to be used in POS, a Menu with the Code of MODIFY must be defined. This will be the lead-in Menu when the Modify Button is pressed. This Menu may in turn call other Modifier Type Menus.
These Menus may be of 12-Button or 40-Button style.
Payment – These Menus are only to be used for the selection of Payment Types in the Payment Entry Screen of POS.
There must be a Menu with the Code of PAYMENTS defined for each Section. POS expects that this Menu will exist and this is used as the lead-in menu for the POS Payment Entry Screen. This Menu may in turn call other Payment Type Menus.
These Menus must be of the 12-Button style.
Button Information – This segment of the screen allows the individual Button properties to be defined.
Current Button – Provides a preview of the Button being Added or Edited.
Button Type – Indicate the Button Type:
Item – Only appropriate for “Normal” Menus. The button would then be linked to an Item that may be sold –- as defined in Item Setup. This may be any Item that is not a Modifier.
Menu – This is available for any type of Menu. The button would then be linked to another Menu of the same type.
Modifier – This is only available for “Modifier” Type Menus. The button would then be linked to an Item defined in Item Setup as a Modifier. See Modifier Setups.
Payment Type – This is only available for “Payment” Type Menus. The button would then be linked to a Payment Type as defined in Payment Type Setup for the Section.
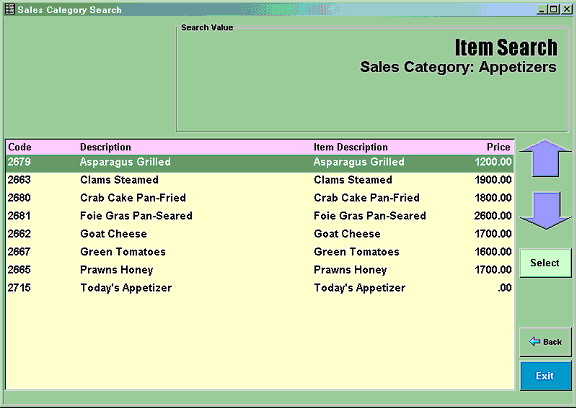
Search – This is available for any type of Menu. When pressed search of the database will be called for the indicated Sales Category or Payment Types.
Exit Modifier Mode – This is only available for Modifier Type Menus. Pressed, this button will cause POS to exit Modifier Mode and return to Item Entry Mode.
Button Code – Based upon the Button type, this is used to identify the POS Item, Modifier, Payment Type, Next Menu, or Sales Category that is to be linked to the button.
Button Label – Enter the text of the Button’s Label. (Defaults from the Item's POS Name.)
Button Color – Use the search option to select a color for the button:
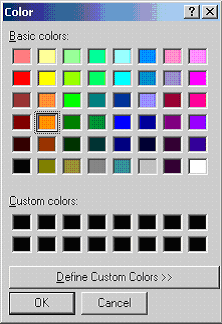
The 'Make Default Color' button makes the selected color the color for all buttons on the Touch Menu.
Button Font - Use the search option to select the desire Font for the button:
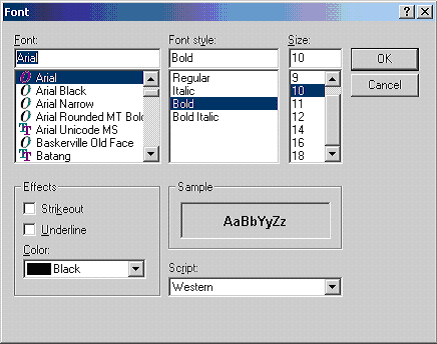
The 'Make Default Font' button makes the selected font the font for all buttons on the Touch Menu.
Clear Button Information - If the button has an unwanted link, press this button to clear the defined information and make this button used.
Copy to Other Sections – Press this button if you wish to copy this menu to other Section(s).
When selected, the screen below will be displayed to let you choose the target Section(s).
Caution: When this option is used, it is your responsibility to know if the links to the Buttons actually exist in the target Section. The program will copy the setups if the links exist or not. Of course, if the links do not exist, the corresponding button(s) will not be functional.
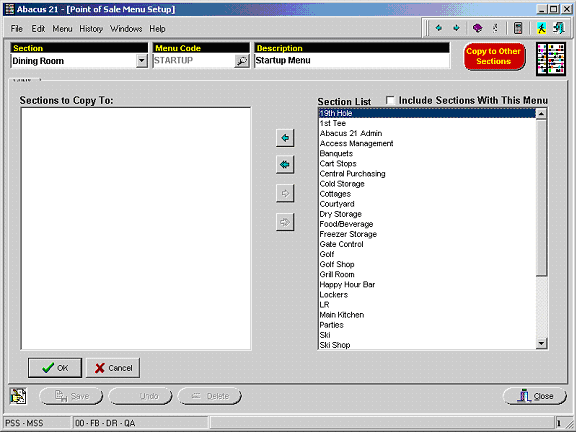
Select one or more Sections to which to copy the Touch Menu (in this case the STARTUP Menu).
POS Touch Button Copy -
This program allows POS Touch Button Definitions to be copied from one Section another Section.
Caution: When this program is used, it is your responsibility to know if the links to the Buttons actually exist in the target Section. The program will copy the setups if the links exist or not. Of course, if the links do not exist, the button will not be functional.
This function is frequently used when there are multiple Sections with the same Menus. This is particularly true with Bar Menus -- where large segments of Menus are likely to be identical:
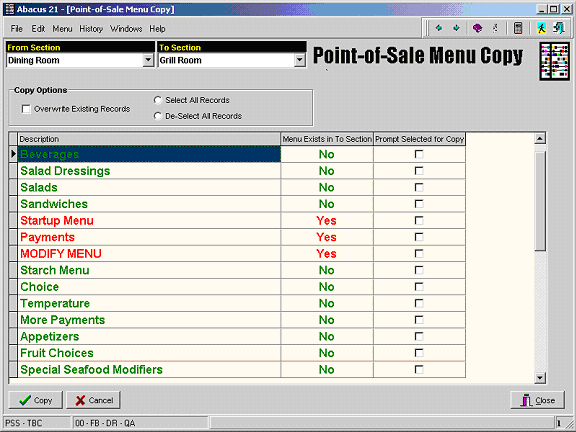
From Section – Identify the Section from which the Touch Button Menus are to be copied. The Touch Button Menus that are defined within this Section will be displayed on the screen.
To Section – Identify the Section to which the Touch Button Menus are to be copied. The display below will indicate if the Menu already exists in the target Section.
Copy Options:
Overwrite Existing Records – Check this box if existing records within a Touch Button Menu are to be copied over. Otherwise only new records, buttons that do not exist in the target Section’s Touch Button Menu, will be copied.
Select All Records – Only Touch Button Menus that are checked in the grid will be copied. This option assists you in setting all Menus as checked and to be copied.
De-Select All Records - Only Touch Button Menus that are checked in the grid will be copied. This option assists you in setting all Menus as unchecked so as not to be copied.
You may also individually check or uncheck individual Menus to be copied by clicking on the individual check boxes in the lower part of the screen.
When the desired Menus are checked, press the 'Copy' button... Or press the 'Cancel' button to select different Sections to copy.
Other Touch Menu Setup Examples -
In this example, a scrolling 'Search' Button will be created.
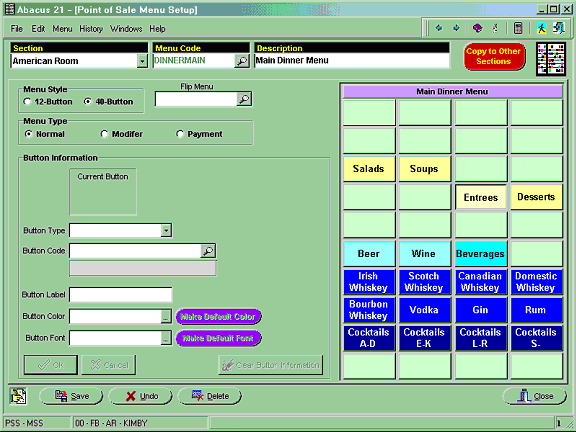
Enter a Code for the Name of the Menu... for example, APPS for Appetizers; then type in the Description.
Select a blank Button on the right side where you wish to place the Item/Menu or Search Button:
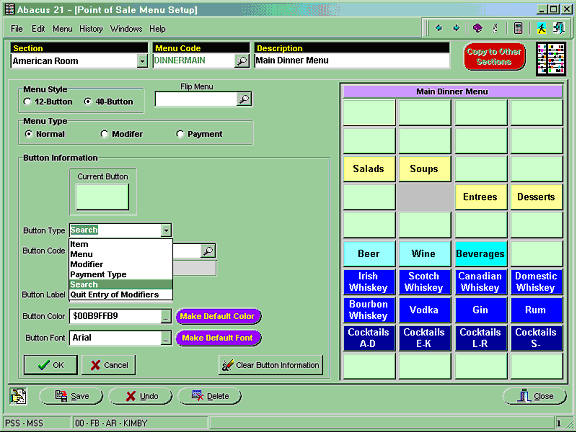
For the Button Code – if you select the magnifying glass and do the look up, you will see a list of your choices. In the example below, I have selected Search – so the listing is of my available Sales Categories:
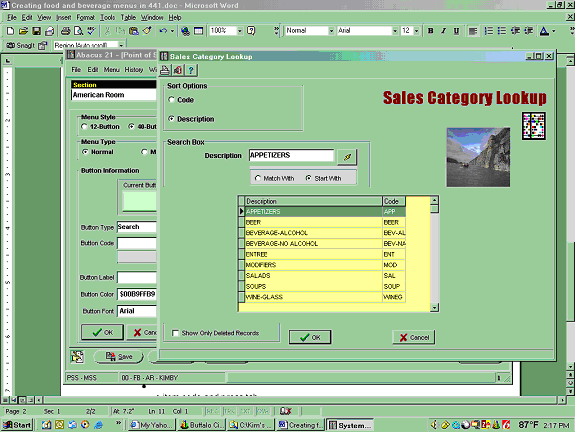
Select the Sales Category you wish to search on. In the example, I am selecting APPETIZERS. The description will appear in the gray box below the Button Code:
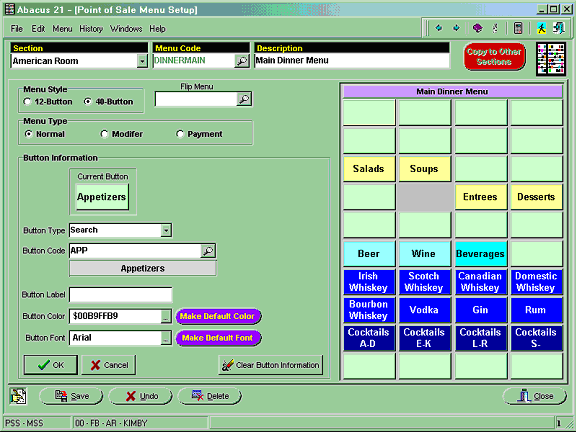
You can now enter the Button Label -- which is what actually appears on the Touch Button in POS. You may also choose to change the Font Color or Size or the Button Color itself by selecting from the Button Font or Button Color options.
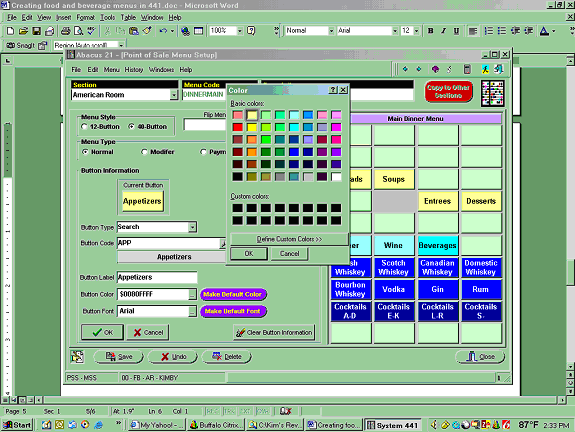
Click the 'OK' Button and select 'Save' if you are finished creating/modifying your Touch Menu.
Remember, the setup of these Touch Buttons is the same whether you are building the button as a SEARCH, an ITEM or a MENU. The next print screen will show you how the above example appears in POS.
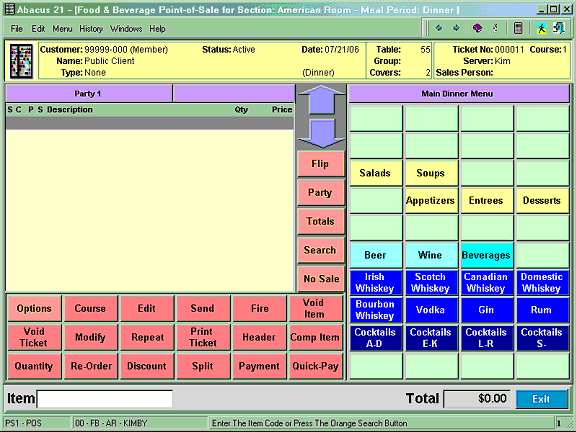
The screen below shows what appears when the Appetizer Search Button is 'touched':
